How to Organize Your Larger SLP Materials
Welcome back! This is week 3 of our SLP Summer Organization Series! If you missed the previous weeks, click here! Each week this summer, I’m helping you organize one aspect of your therapy space or practice. So far we’ve organized your primary speech materials as well as your other smaller activities and materials.
This week, we’re organizing your larger materials that don’t fit neatly into binders or boxes!
Mission 3: Organize Your Larger SLP Materials
Now that you’ve already organized all of your smaller materials, let’s take a look at your larger materials and activities. For this week, let’s focus on your actual therapy materials and activities. We’ll organize your generic toys, games, and books in a future week!
Step One: Gather your Materials
First, you’ll need to get out all of your larger materials. Figure out what you have to work with before you figure out the best way to organize everything.
Step Two: Simplify and Prune, if Possible
Next we need to go through and see if anything needs to be removed from your collection. Look at what you have and throw out anything that’s broken or missing so many pieces that you can’t really use it well. Also look for those materials that don’t really ever get used. There’s no point keeping things that aren’t being used.
Another thing you can do to prune down is to remove duplicates. And when I say duplicates, I’m talking about two materials that serve the same purpose. If you have three different materials that explain “how big is your problem”, go through and pick out the one you use the most and get rid of the other two. You can always vary your actual therapy activity by using a different game or reinforcer. You don’t need three different ways to teach a skill.
During this step, I also recommend that you take a good look at your materials and activities and see if you can replace any larger activities with specific worksheets or small activities that will fit well in the binders you set up last week. If you need additional worksheet-style resources, don’t forget to check out our membership program! We have hundreds of pre-made therapy worksheets and you can print out as many as you want for only $25 per month!
Step Three: Find Organization Solutions
Once you’ve had a chance to take a look at all of your therapy materials, it’s time to start looking for some great solutions for how to organize them. This is going to depend entirely on what types of materials you have and their size. So I’m not going to prescribe “one-size-fits-all” answer. Instead, I’ll show you some of my favorite ways to organize larger materials.
Sound Objects & Larger Cards:

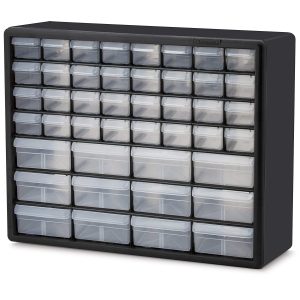
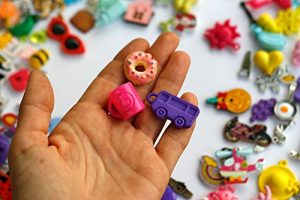
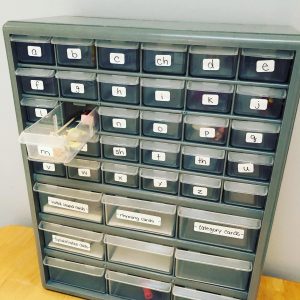
I love this type of drawer system for both my sound objects and my larger cards. In the top, smaller drawers, I have a collection of miniatures that all start with the particular sounds listed. I started with a pack from amazon (see below) and then filled in the gaps with other small items that I found around my house, such as paperclips, barbie clothes and foods, etc.
In the lower part, I have cars for various phonological awareness skills (ex: for rhyming, I write two words that rhyme and then we find those objects) as well as category/semantics cards. You could also add any other speech or language cards you have in here as these bottom drawers are larger.
Here are some links to specific materials I like for this, in case you’re looking. These are amazon affiliate links, which means that if you decide to purchase through my link, I will get a small commission at no cost to you. Thank you in advance if you use my links!
Refrigerator Organizers:
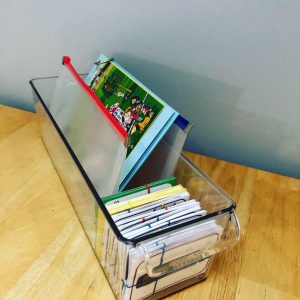
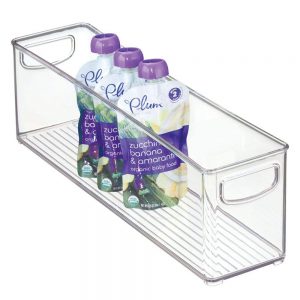
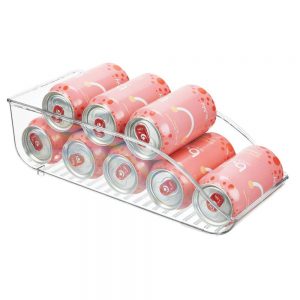
Another thing I love to use for organizing therapy materials are the containers meant for organizing the contents of your refrigerator! I love these because they are space-efficient and they are also clear so you can easily see what you have. The one pictured here is a “juice box” sized container. I also like the ones meant to organize soda cans for slightly larger materials. Here are a few links if you’d like to grab some of these. The following links are amazon affiliate links so I’ll get a small commission if you purchase through my link.
Game Boxes:
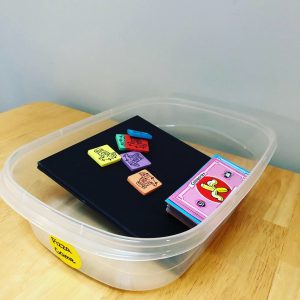
Game boxes always take up so much space! I highly recommend the following organizational hack:
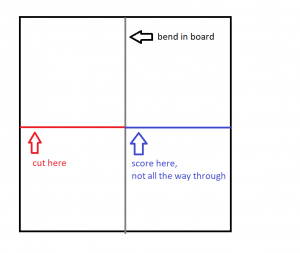
- Cut game boards into quarter-size folds. All you’ll need to do is grab a box cutter and cut a slit through the board that goes halfway across on the left side and score the front of the board slightly on the right (not all the way through, you just want it to be able to bend). Here’s a diagram but if you’re confused, just go find another board that does this quarter-sized fold so you can see what it looks like:
2. Now, find a short and wide tupperware container or storage to throw it in. The key here is to find something smaller than a normal game box. You also want to make it stackable as well.
Trapper Keeper of Activity Bags:
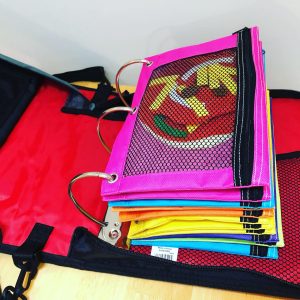
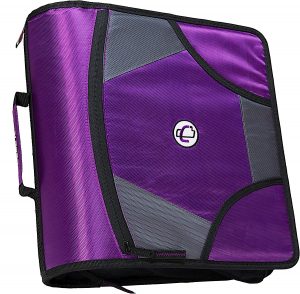
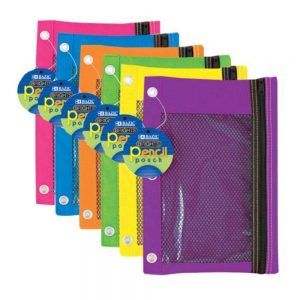
If you have several smaller activity sets with lots of pieces, I highly recommend a 3-ring binder that has a zip closure around it with a bunch of pencil pouches inside for your activities. The one you can see on top here is full of felt “pizzas” with pizza toppings. It has recipe cards inside that give directions for making a certain type of pizza. I use this one for playing pizza shop where we practice placing an order, interacting with customers, following directions, and giving directions. I made this activity myself.
You can use this type of storage system for lots of different small games and activities that don’t take up a ton of room but do have a ton of pieces. Here are some links to products I like. Again, these are Amazon affiliate links (they make me disclose that each time).
Step Four: Find a Place to Store Them
Our final step once you have everything in proper organization containers is to store it all. I highly recommend that you store these types of materials and activities out of sight. This will reduce clutter and help your clients to focus better.
The best option would be a cabinet with doors that close. But if you can’t find that, another easy way to achieve this is to tack a blanket or curtain in front of a shelving unit that contains your materials.
Your Next Mission:
Don’t miss next week’s post where I help you figure out how to organize your manipulatives and visuals!
