SLP's Guide to Organizing Your Therapy Materials

This summer, we’re getting you organized.  No more searching for materials.  No more wasted planning time.  No more getting stressed out from the mere sight of your therapy room (or closet…or car).  It ends this summer!  This is the summer of massive SLP organization and I’m SO glad you’re along for the ride!

Now, I know you’re busy.  You may still have a full caseload this summer.  Or maybe a side job.  Or taking care of your kids.  That’s why I’m going to break this down and make it simple.  

How it’s Going to Work:

Each week, I’m going to send you on one mission.  Each mission will help you organize one aspect of your materials or your job.  By the time mid-August rolls around, you’ll have completed 11 amazing organization missions and you’ll be the most organized, prepared, and confident speech-language professional around.  Your friends will be jealous and your stress levels will thank you!

So without further ado, let’s get on to this week’s mission:

Mission 1: Assemble Your Core Team

First and foremost, we need to help you assemble your core team of players.  And by players I mean materials.  The whole point of this step is for you to have one central hub of materials that you can grab and go and be able to do any therapy that you need.  In next week’s post, we create organization for those materials that you don’t use as often.  But for now, we’re just looking to build your central hub.

As you know, I’m a big fan of step-by-step processes so I’ve created one for you here.  What you may not know is that I also love a good sports ball analogy.  Ok, that may not be true, but I think it works pretty well for this one.  So bear with me as I put my sports ball knowledge to the test!

To receive your mission, watch this video or keep scrolling for the written instructions and links.

Step One: Assemble Your Roster

Write down all of the materials that you use frequently.  We’re talking about the ones that you use almost every day.  This may include your articulation cards, language cards, stickers, clickers, mirrors, etc.  Write down everything that you use often so you can see it all in one place.  For this round, I suggest that you don’t include the games and toys that you use to motivate your clients as these tend to rotate often.  For this roster, we just want to include your primary therapy materials.


Step Two: Recruit New Talent

You may be noticing that you have a lengthy list of cumbersome materials that definitely wouldn’t fit nicely into that cute “Speech-in-a-Box” kit pictured above.  Now’s the time for us to take a look at what you’re currently using and see if there are any alternatives out there: some new talent…so to speak.  Here’s how you can analyze your current roster and see where improvements can be made: 

  1. Put a star next to your multi-taskers: Any materials that you can use to work on multiple problems or topics is a multi-tasker.   These are great because they save us space on our core team.
  2. Put a star next to the materials that are small: Unlike in basketball, smaller materials are better.  As long as they’re still big enough for the child to see the picture, smaller is better!  Smaller materials means everything is more compact, easier to move, and easier to keep organized.  Because let’s be honest; none of us have that much room to start with.

Ok, the items you starred above are your all-stars!  They’re going to be able to play multiple positions and get into those tight spots.  Keep those guys on your team.  Now, let’s look at the rest of your roster.

3. Look for replacements for the big unitaskers: Here’s where we get into recruiting new talent.  Take a look at the items on your list that aren’t starred.  Look for some alternatives that are either smaller or can serve multiple purposes…or both!  Here are some ideas of replacements you can make:

Awesome Space-Saving Multi-Taskers:

Highlights Magazine

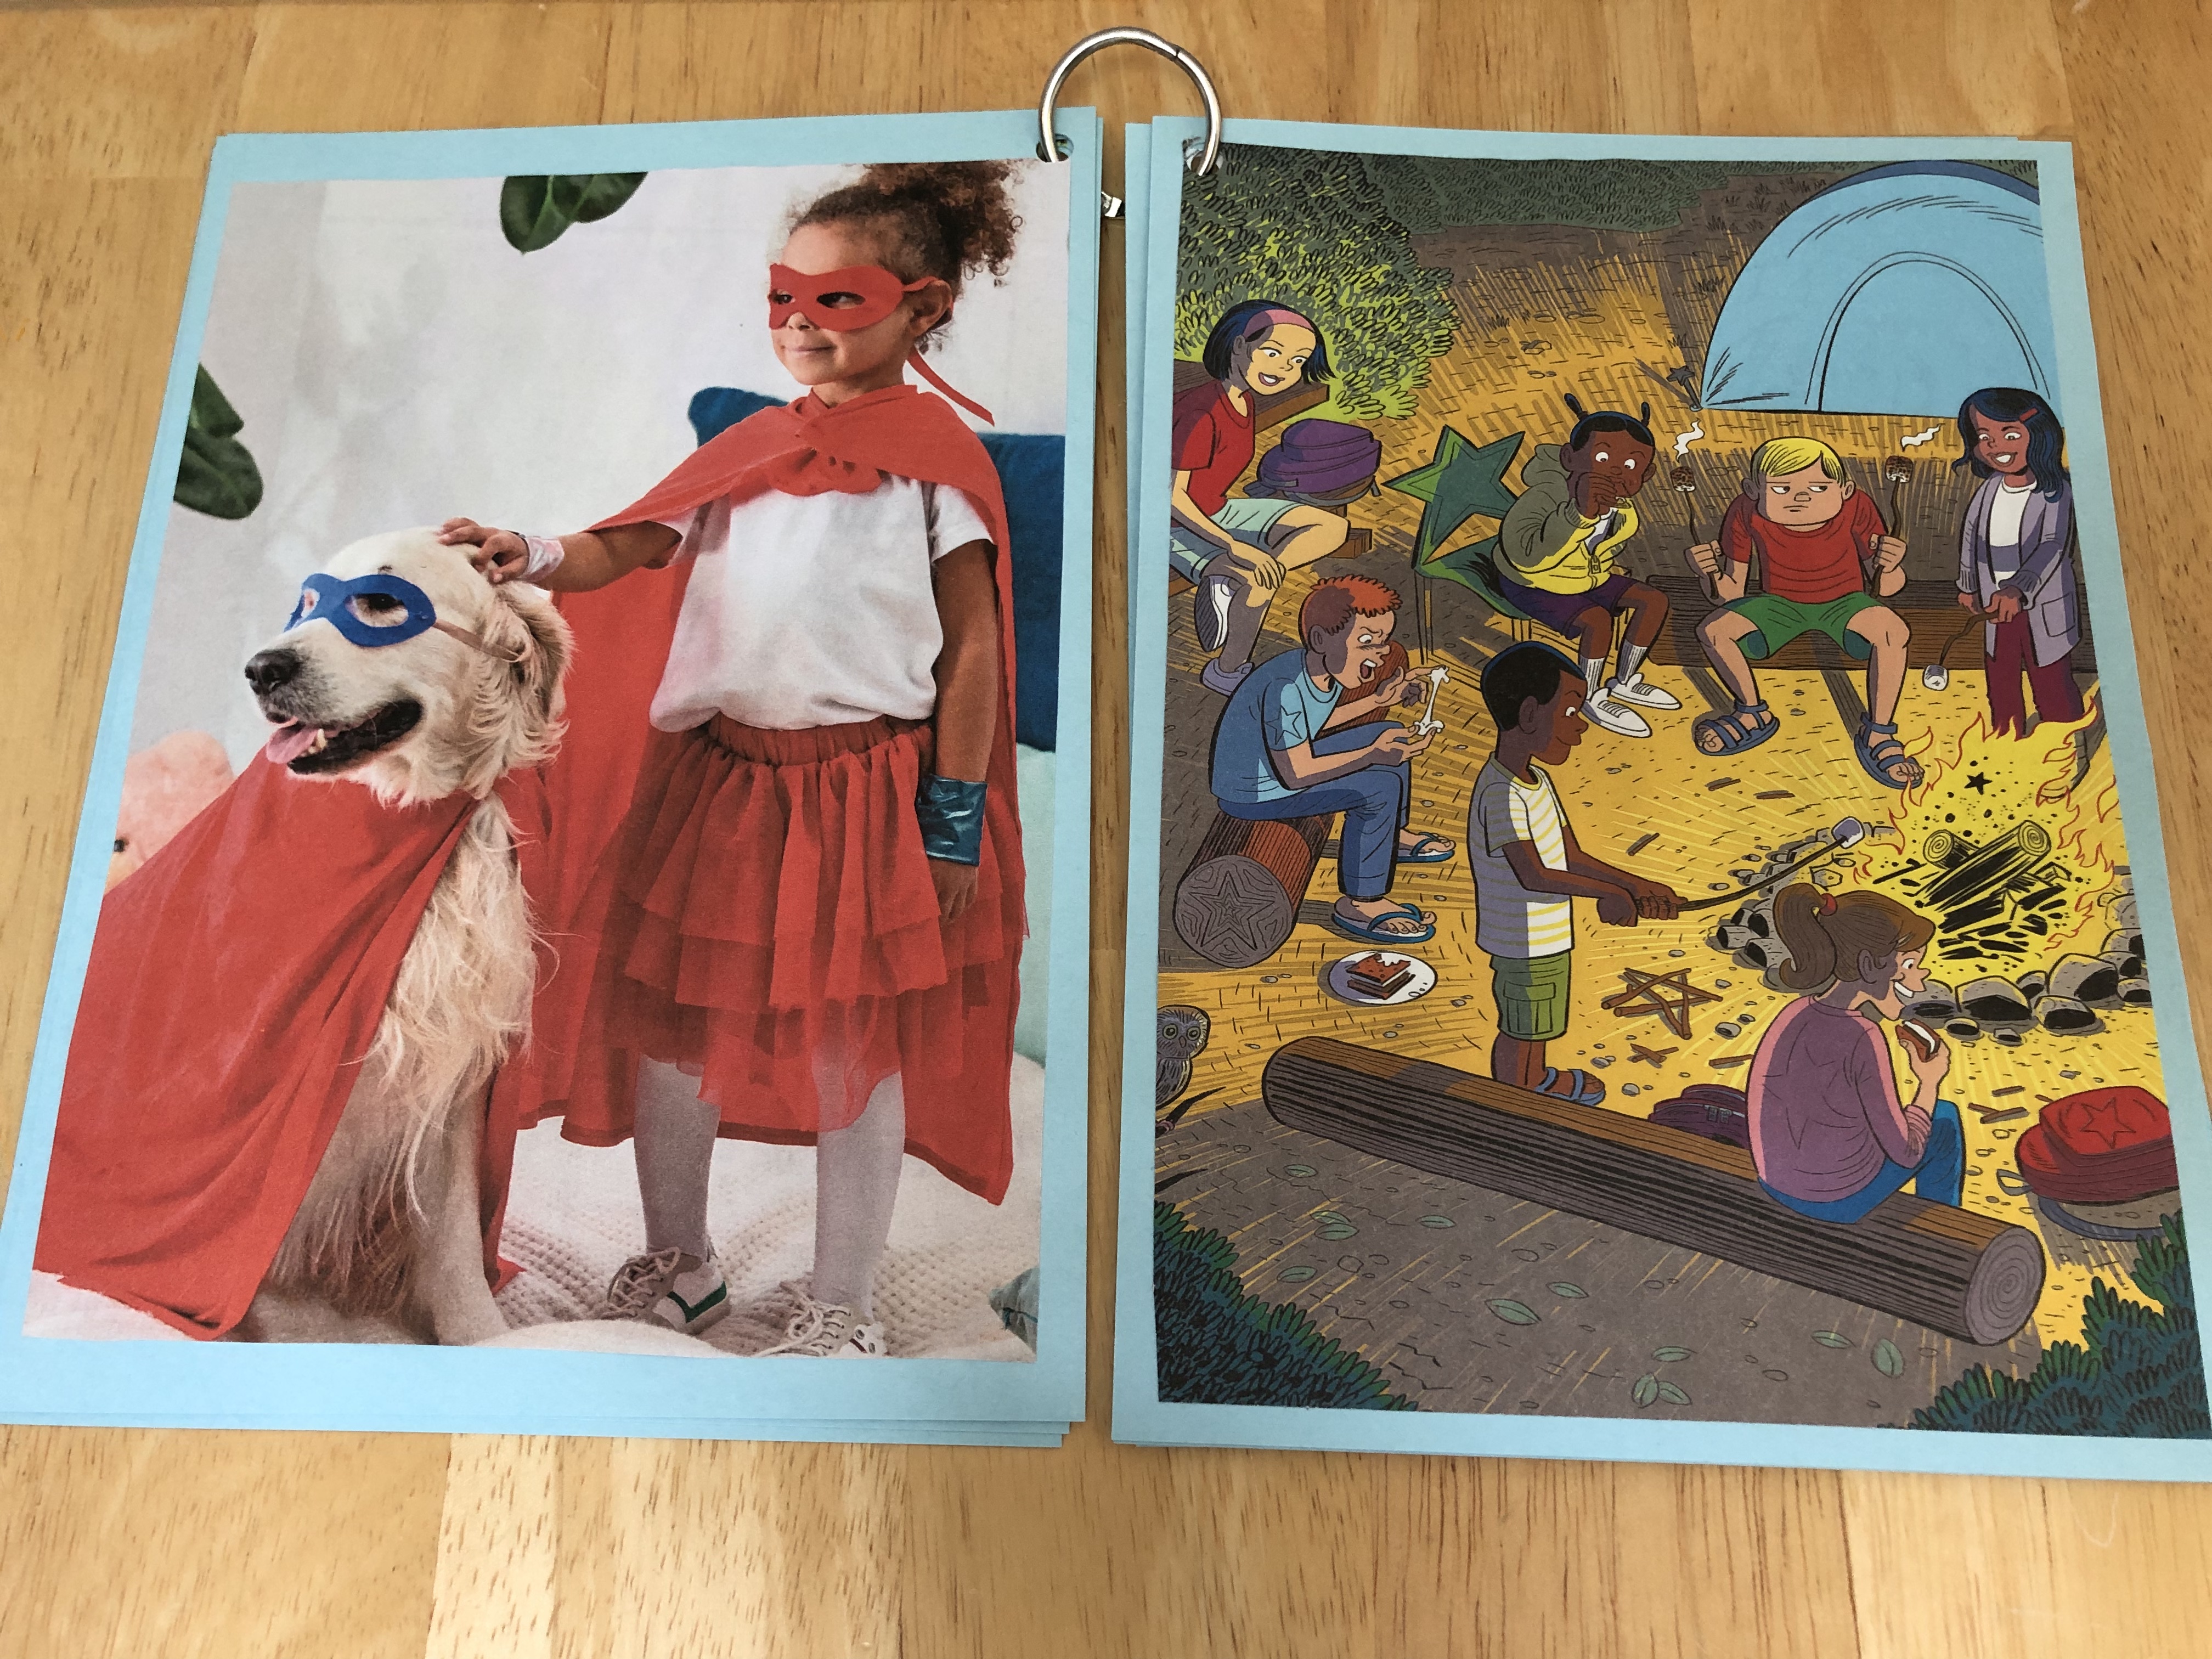
Magazines often have AMAZING pictures that can be used in therapy. Just grab a magazine like "Highlights" or "Picture Puzzles" and cut out a few pictures that have a lot going on. Glue them onto construction paper and you have everything you need to help a child generalize a new speech or language skill into sentences or conversational speech. I love using these to work on grammatical structures like "he" and "she" as well as speech sounds. I'm also a big fan of the picture puzzles that have two pictures that are the same and you have to describe the differences. Those really works on our children's language skills!
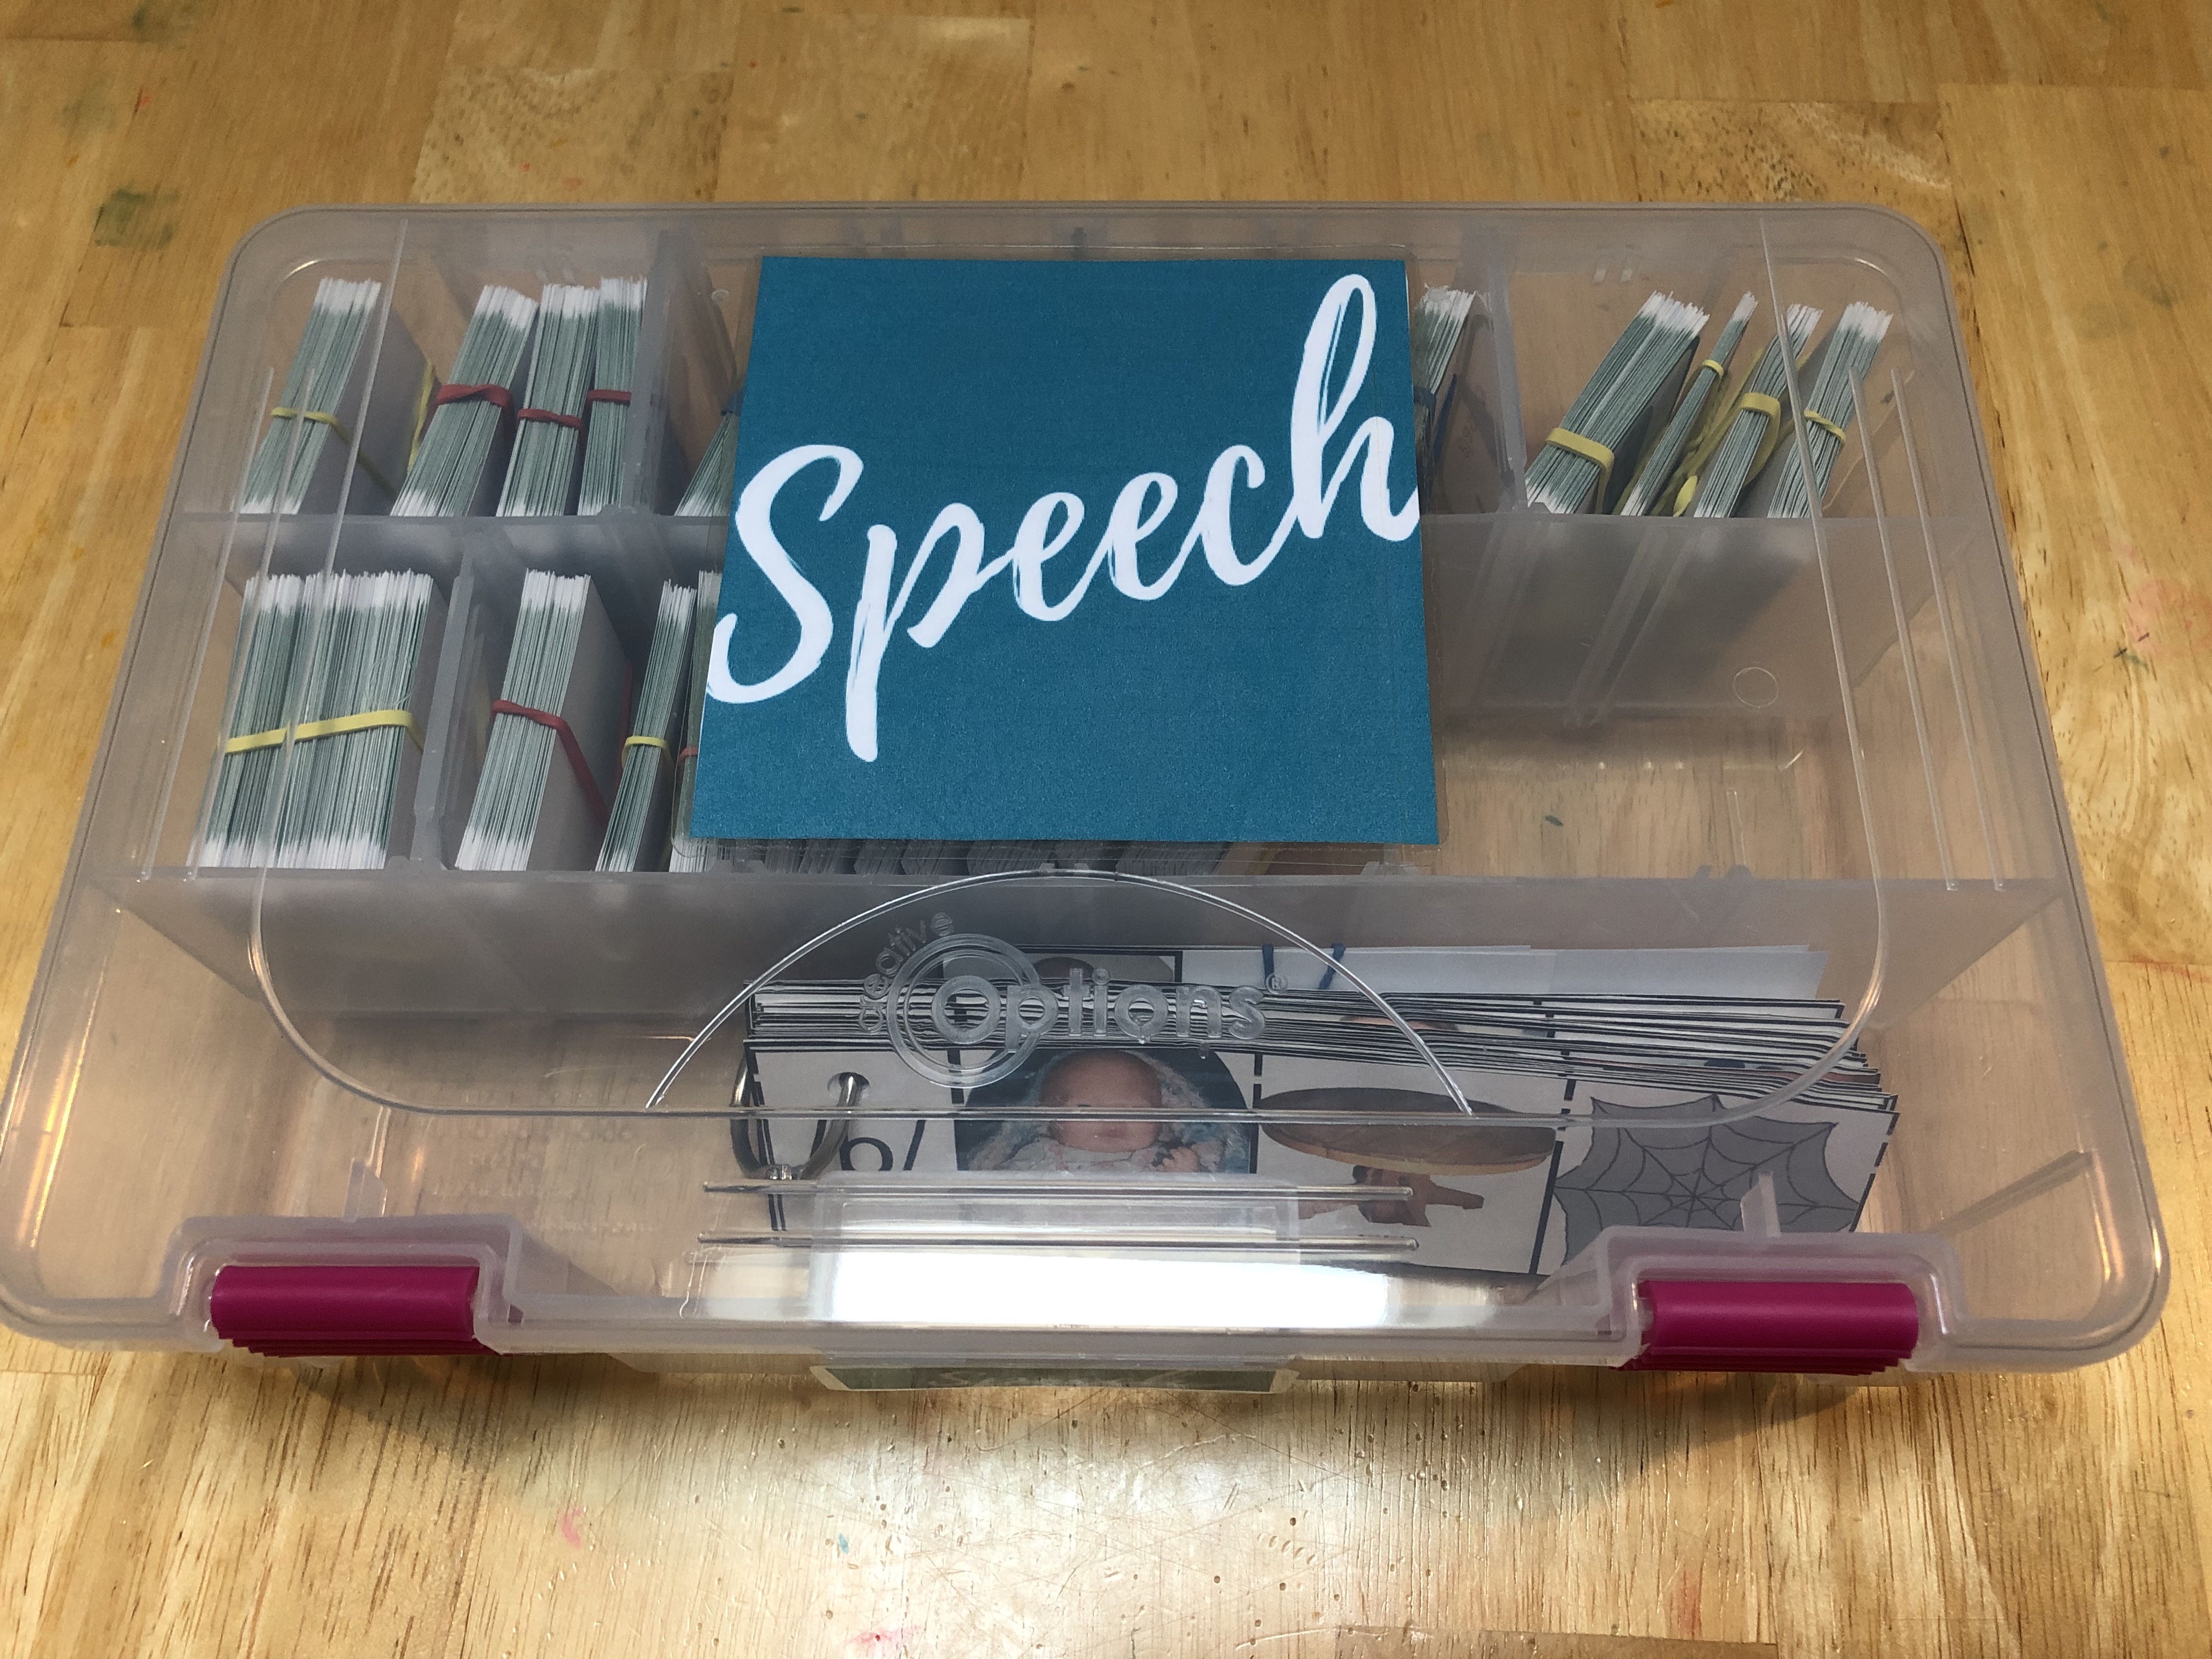
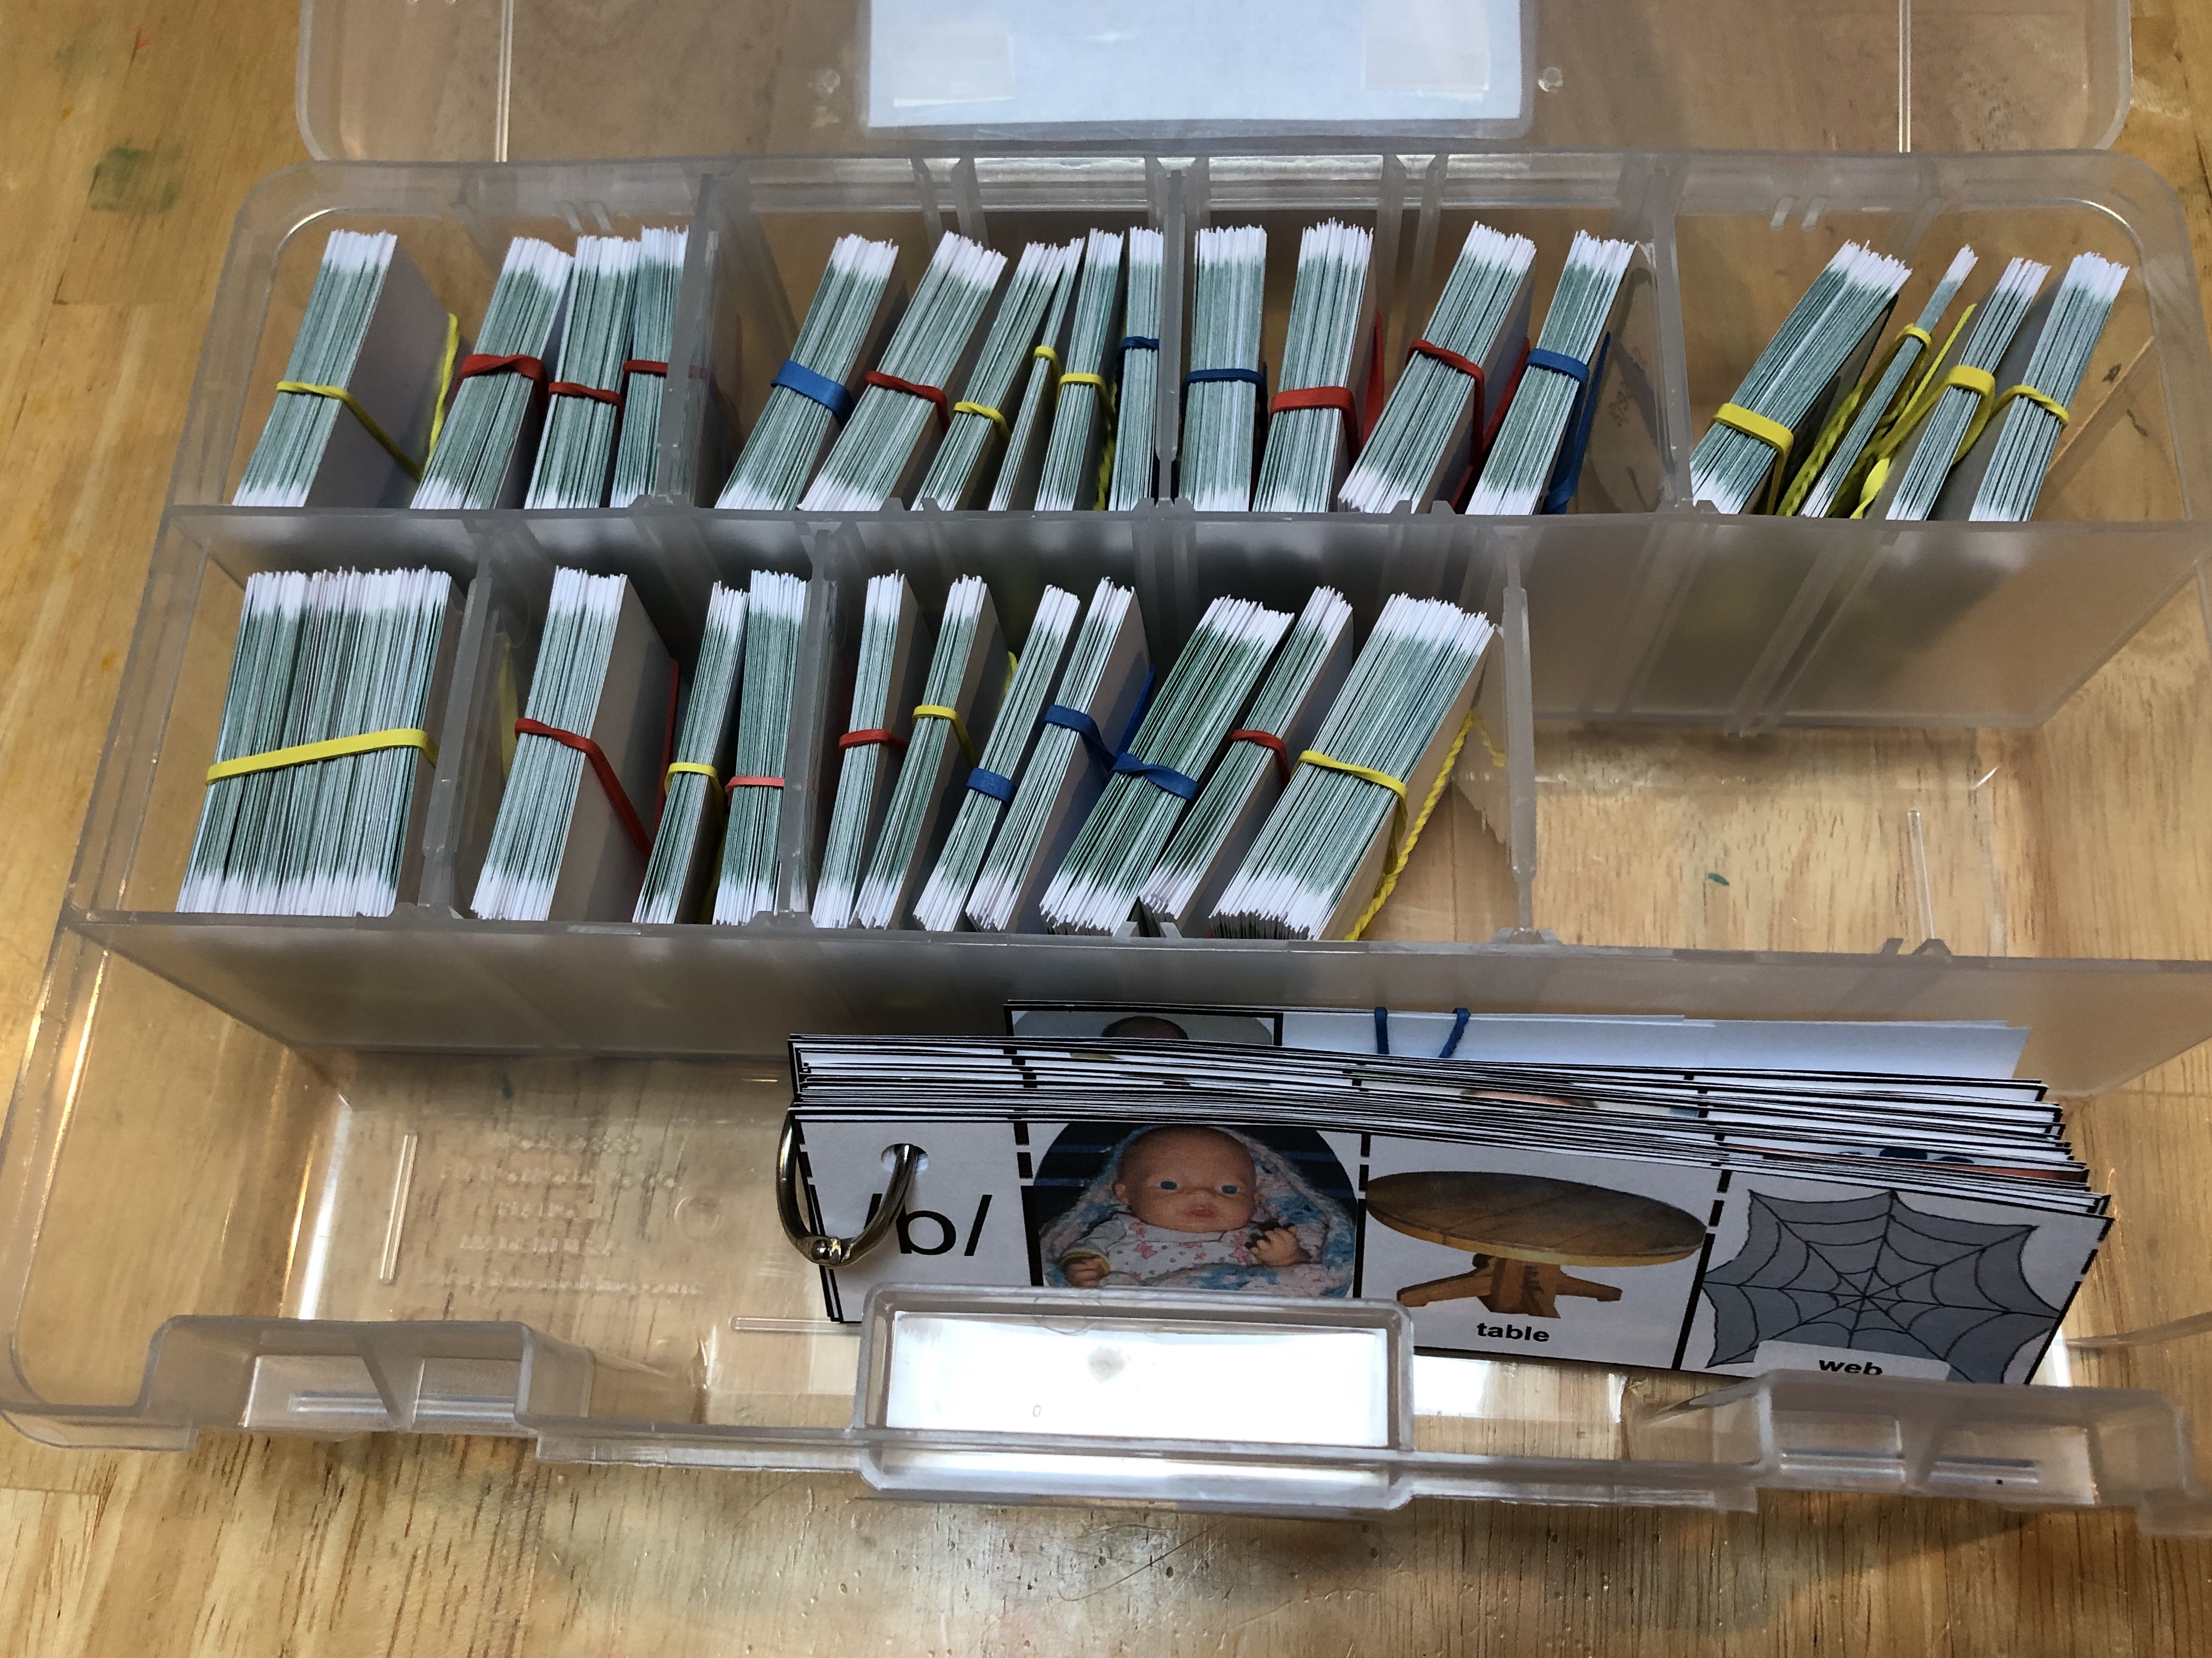
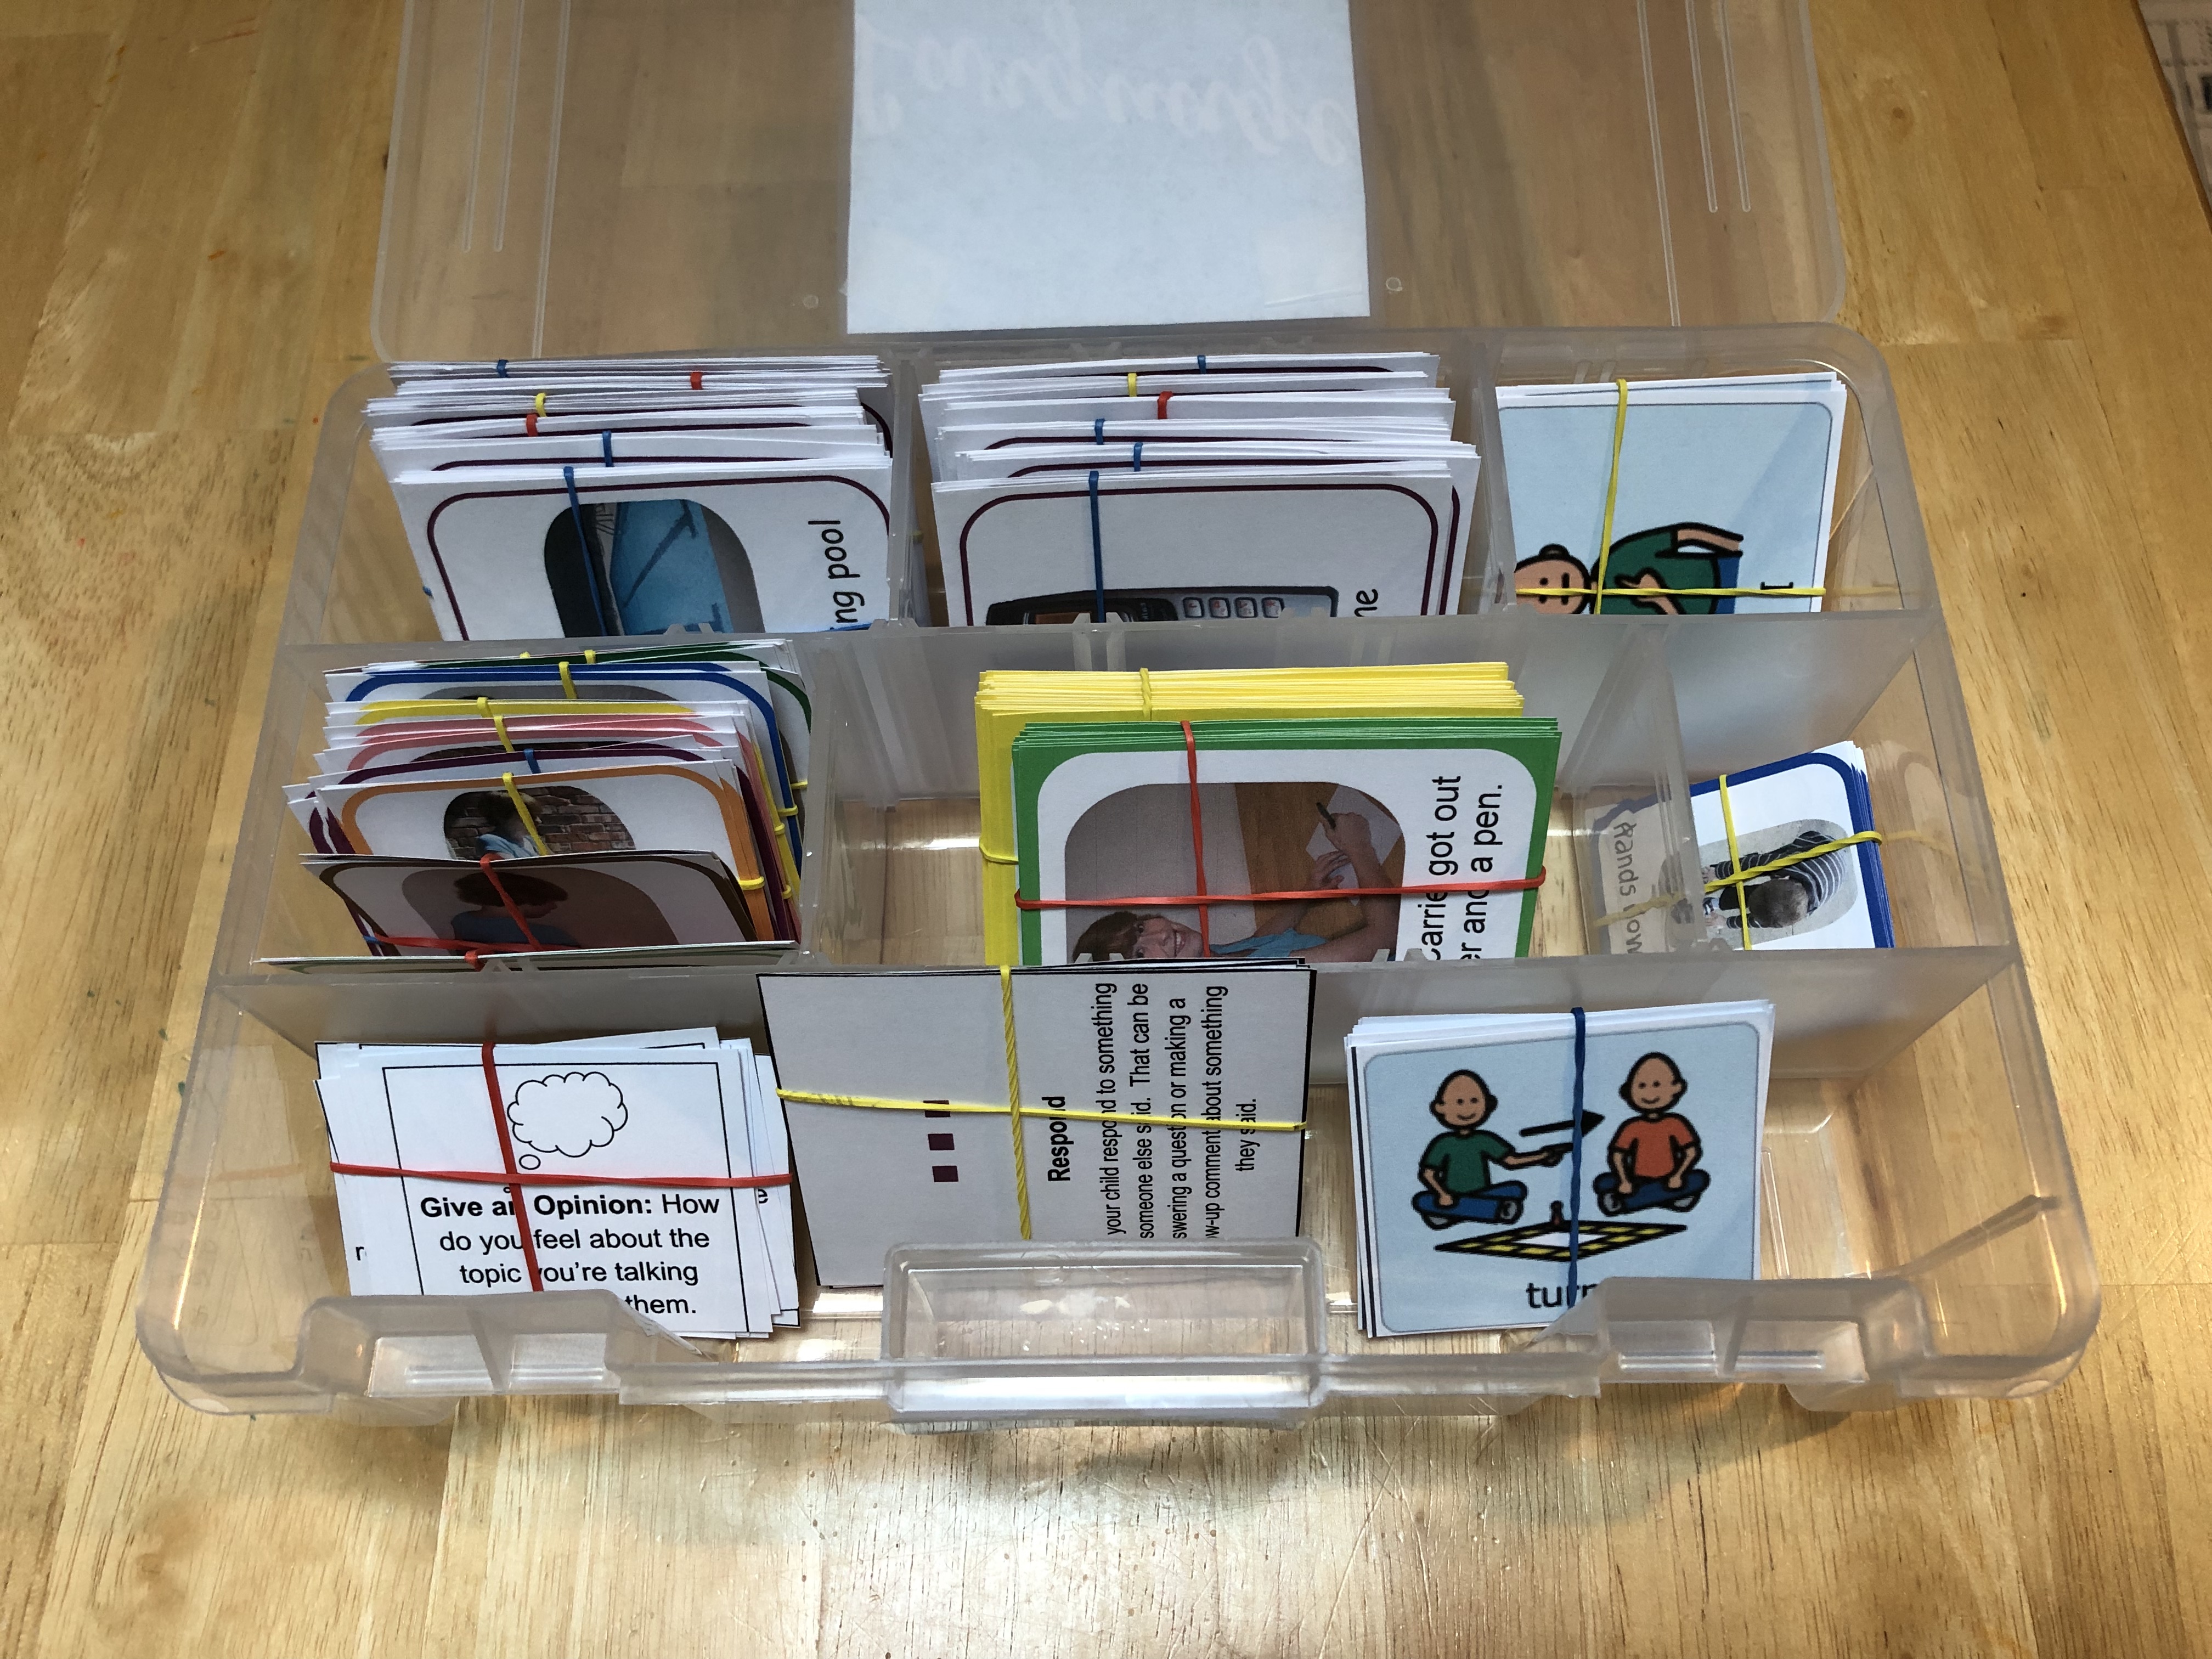
2x2 Artic Cards

There's something quite magical about the 2"x2" size artic cards! As you can see in this picture, you can fit an entire set of artic cards into a small craft organizer. These are my go-to for articulation practice, but you can also use these for vocabulary practice and other therapy activities as well. You can purchase the PDFs of our 2x2 articulation cards here:

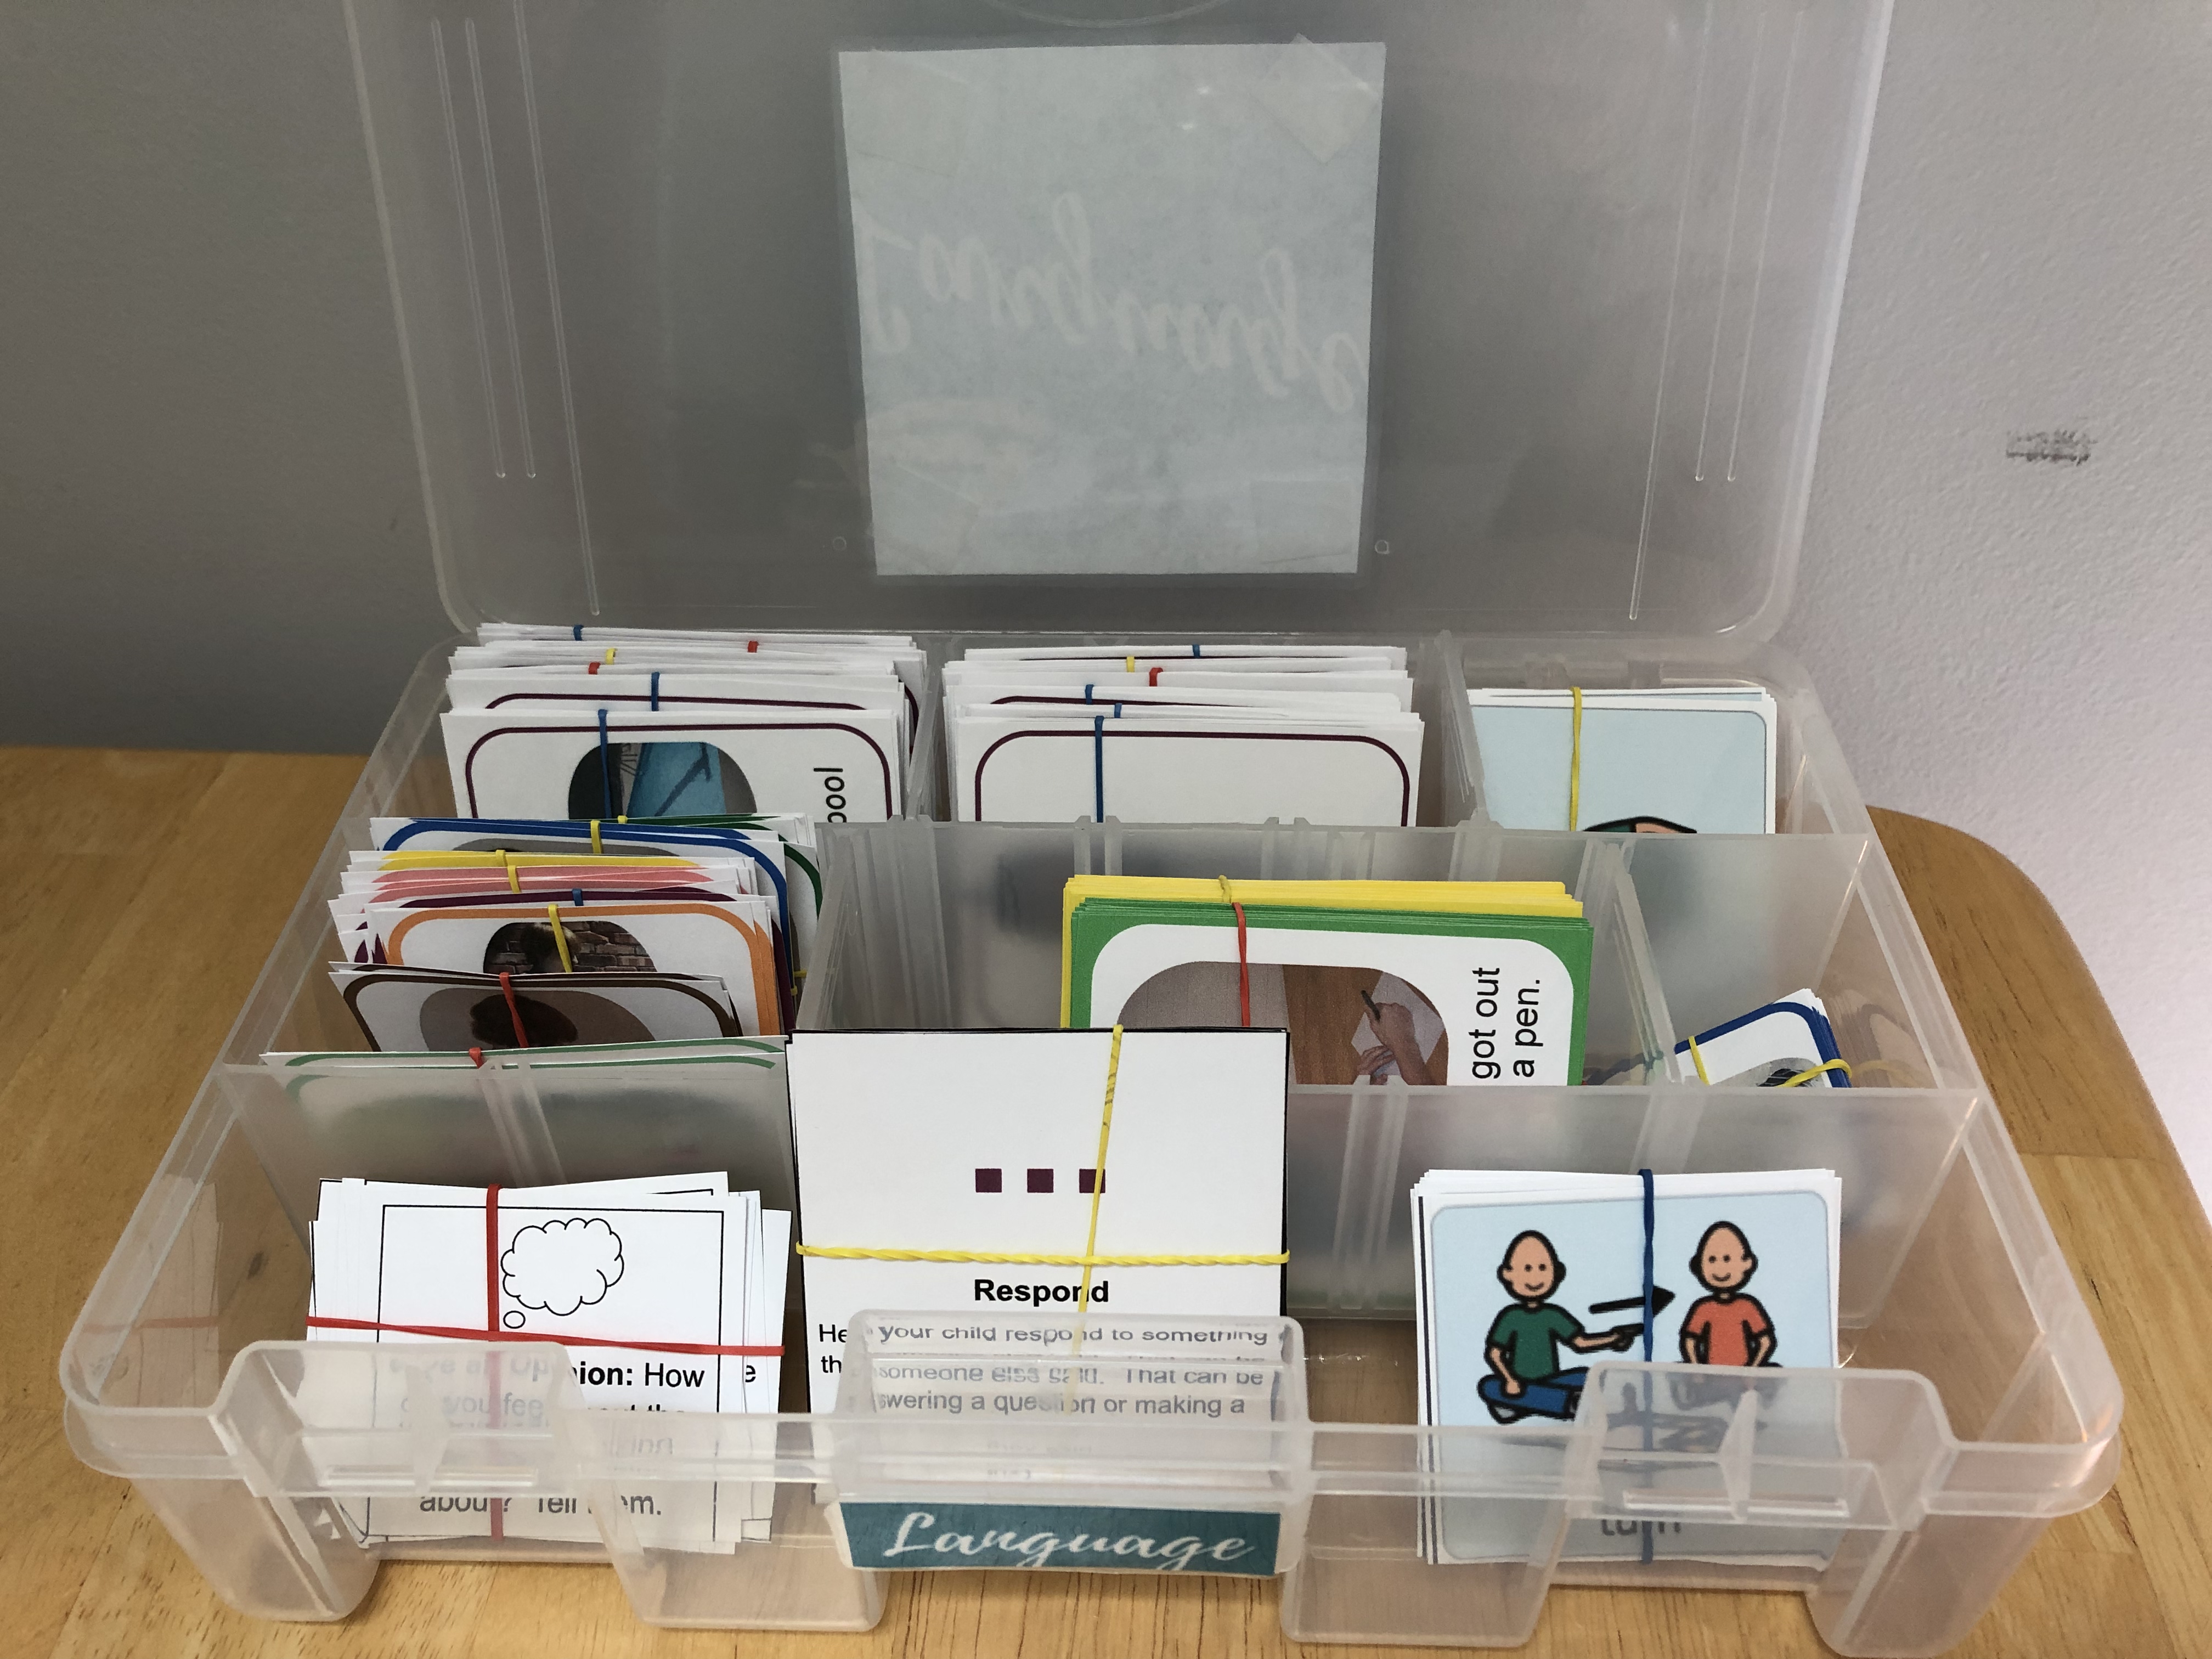
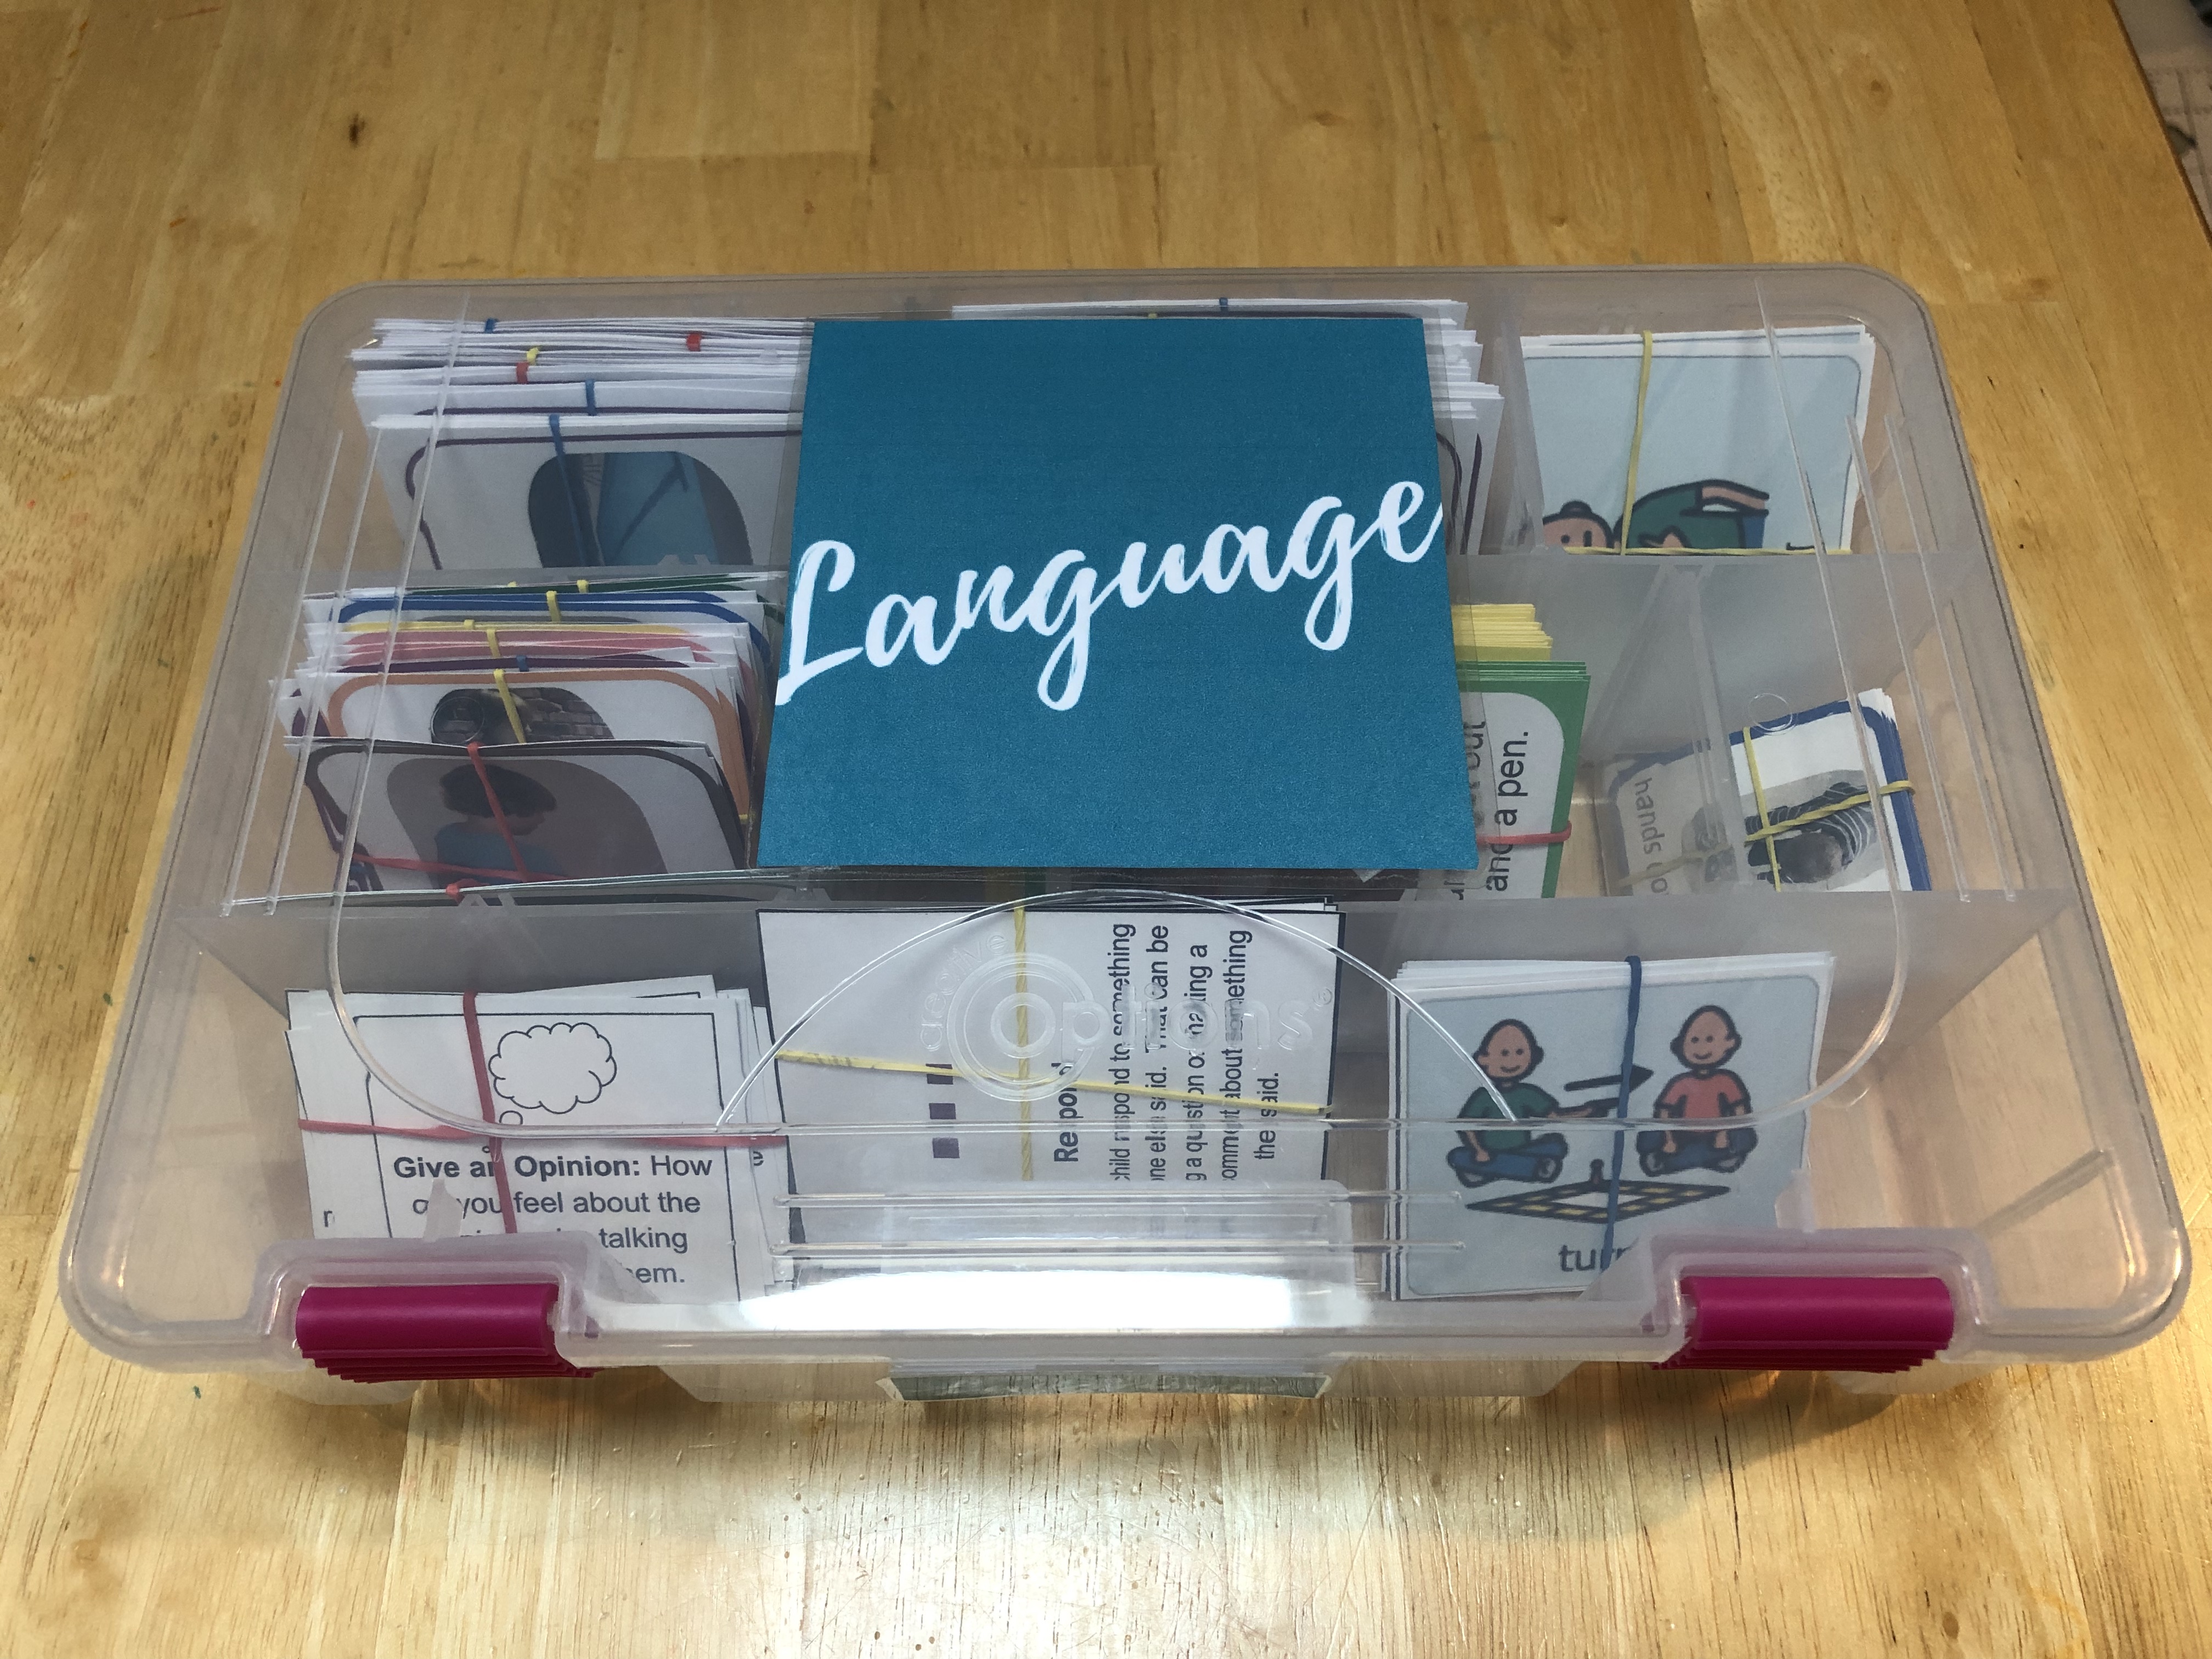
Carrie's Language Card Bundle

In addition to having a set of articulation cards with me at all times, I also like to have a set of language flashcards that fit into an easily transportable case, like the one above (don't worry, we'll talk about the cases in a little bit). I choose language cards that will help me work on multiple skills, including social language skills. My kit includes:
- Vocabulary Cards with wh- Questions on the Backs
- Flashcards for some common first words
- Flashcards for common emotions
- Sequencing Cards
- Verb Cards
- Past Tense Verb Cards
- Prompts for Conversational Skills Cards

You can assemble your own pack or click the link below to purchase our pack. Just keep in mind that you want them to be small enough to travel and not so numerous that it's cumbersome.

Step Three: Fill in with Utility Players

A utility player is one who can play almost any position.  (Or so I’m told…I think this one is a baseball analogy…?)  We can’t possibly pack everything we’d ever need into our core team.  So, once you’ve packed in the essentials, let’s fill out the team with some utility players that can work on pretty much anything.  This will allow you to get rid of some of the players on your roster that sit on the bench most of the time.  

For example, those pacing boards and sentence-builder worksheets don’t get a ton of use but they’re very helpful when you need them.  Instead, replace both of those things with a simple laminated sentence strip that is blank (just the lines) and a dry erase marker.  Now, you can draw a quick pacing board if you need it or jot down a quick sentence structure that you want the child to practice.  A laminated sentence strip doesn’t take up much space but you can use it for anything you can draw!  

Here are some great utility player options.  Again, the ones from Amazon are affiliate links so I’ll get a small kick back if you purchase through my link:

Utility Player Options:

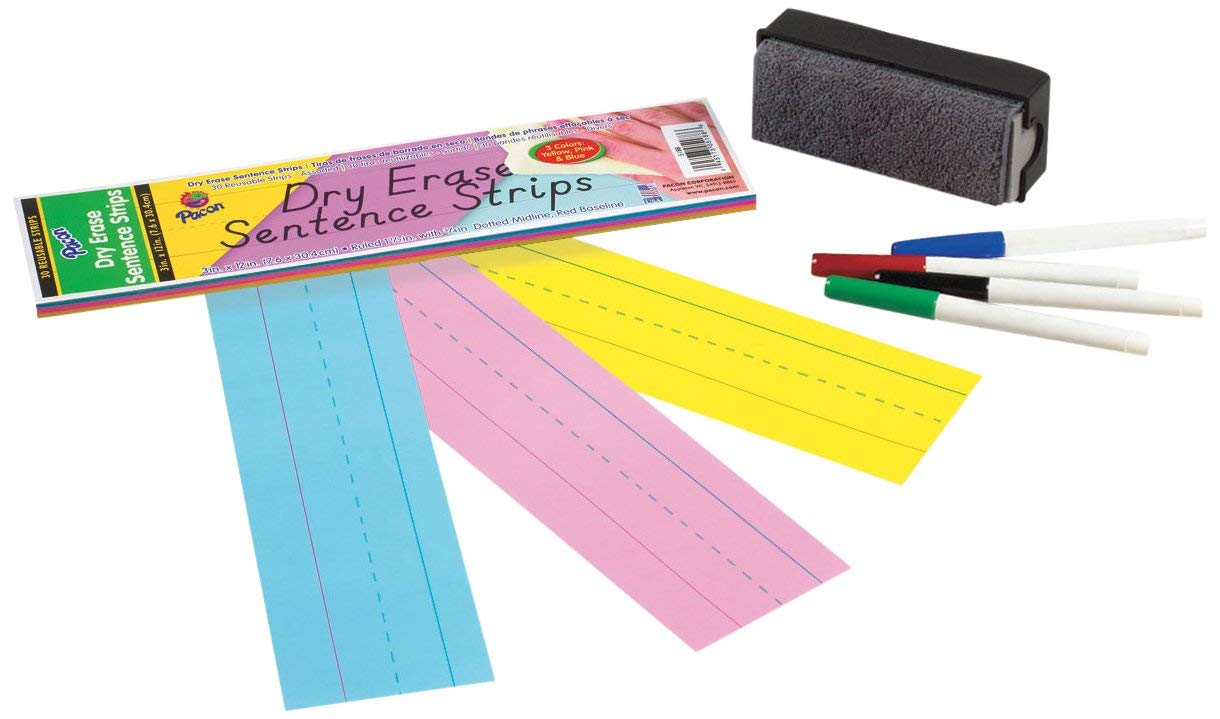
Dry Erase Sentence Strips

These are great multi-use tools because you can literally draw anything you want on them. You can use them to help children increase utterance length by writing a simple sentence structure with a few stick-figures, such as by writing "I want ____". You can draw a quick pacing board or a "stop" and "go" symbol for easy AAC. You can write longer sentences and have your clients edit for grammar. Or you can write character names on them and have your clients act out a story they just heard. You can click the link below to buy these from amazon, or we have a set of them in our "Speech-in-a-Kit Visuals" bundle that you can print off, laminate, and use right away.
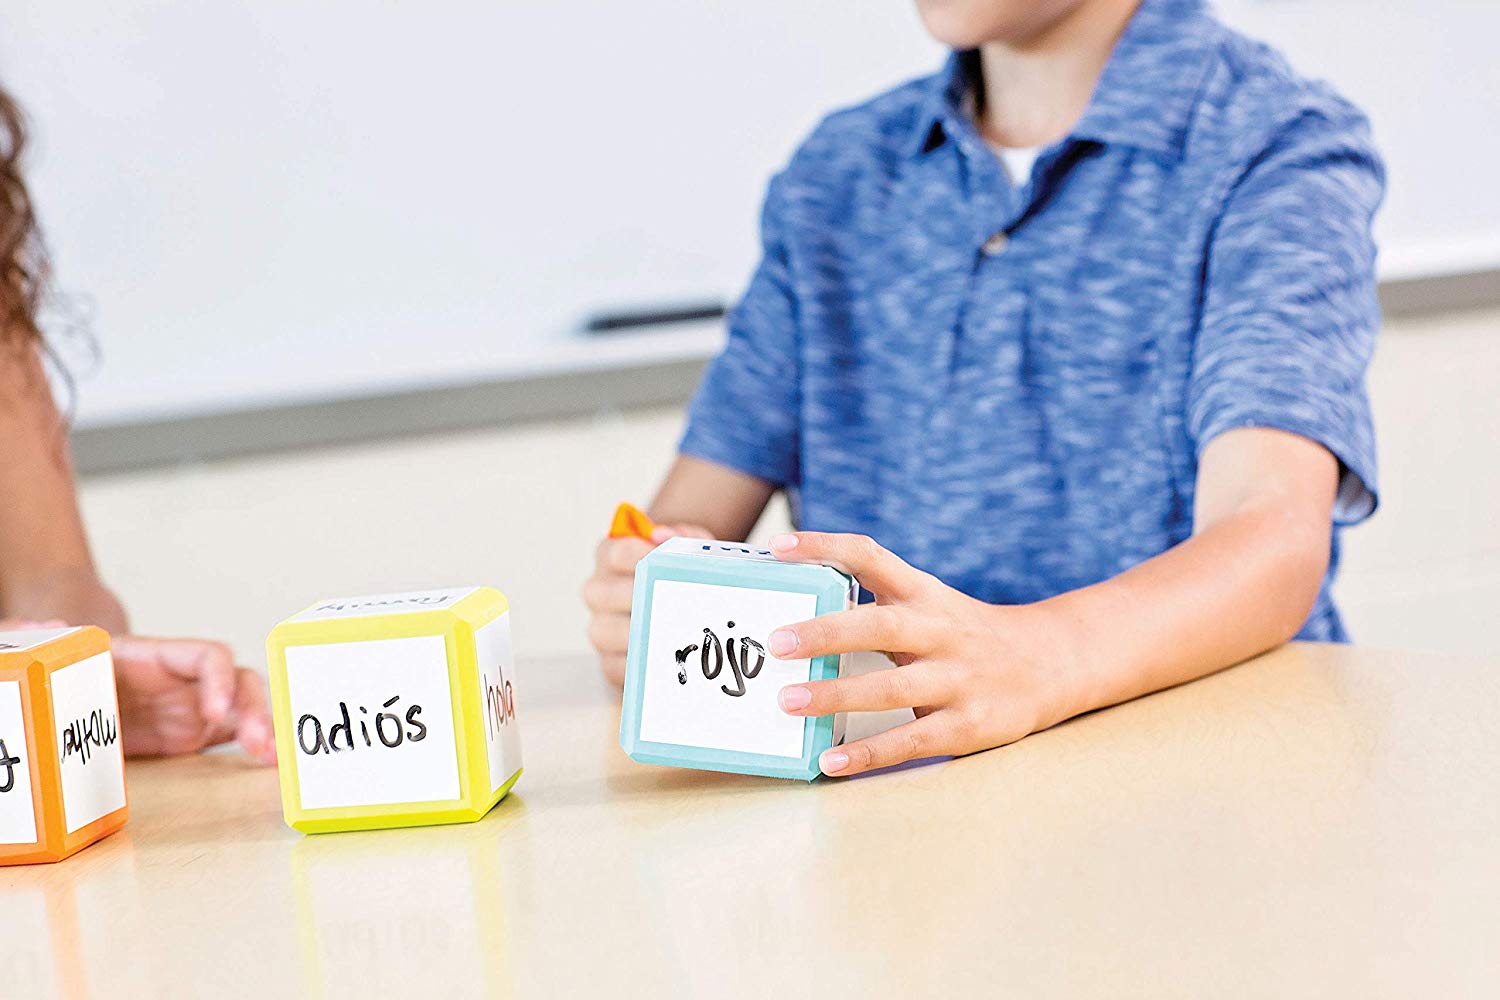
Dry Erase Dice

Similar to the dry erase strips, these can be used for pretty much anything as well but since they are dice, they make it way more fun! Working on sounds in syllables? Write a vowel on each side and have the child roll to see which vowel he'll pair his consonant with. Or, write yoga poses on each side and challenge the child to practice his skill while holding that pose. You can also draw pictures on these to help children practice vocab or write words with their target speech sounds. So many possibilities! I found one of these at the dollar store but you can also buy them from Amazon with our affiliate link:
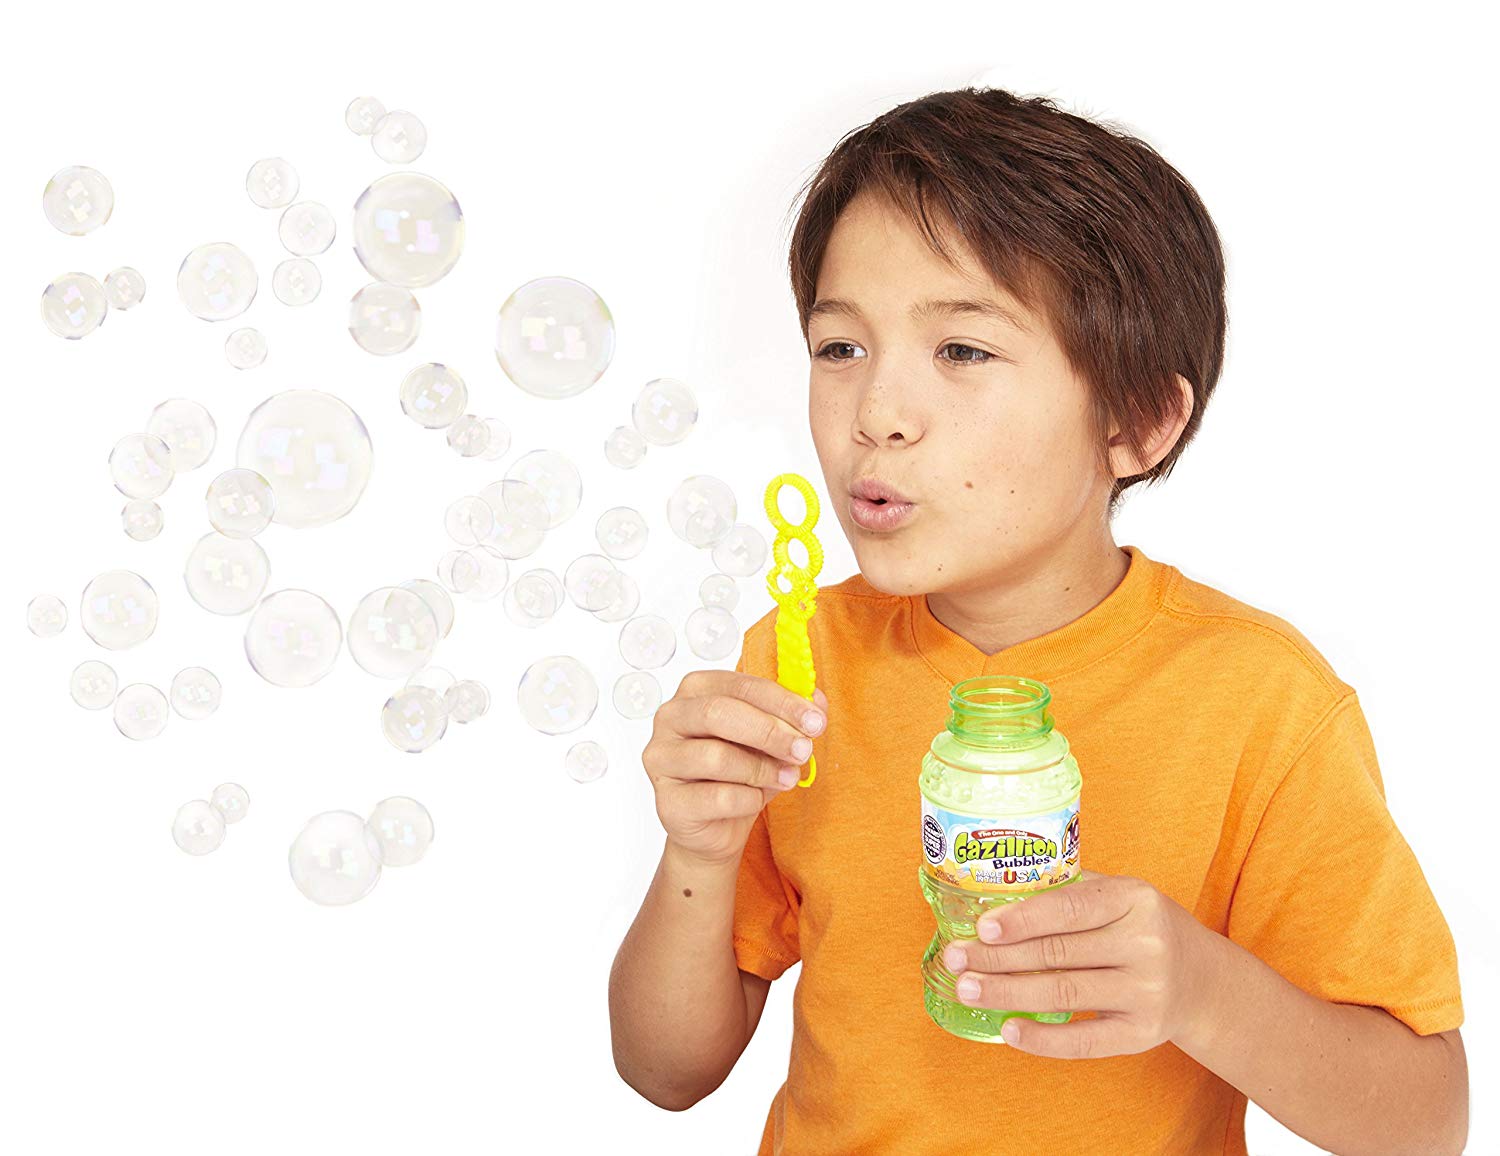
Bubbles

Bubbles have a certain kind of magic that will get a kid to do things you'd never dreamed possible! I think these are great for just about any activity with young children. We use them to request more or to comment on what we're doing ("pop, blow"). We can talk about big and little and wet. Or, we can just have our client say their word/practice their skill a certain number of times in order to get more bubbles. I consider bubbles a must-have in my bag. I personally like either the "Gazillions" brand bubbles (because the wand has more holes so you have less chance of mis-fires) or the no-spill kind. I'll throw the amazon affiliate links in here if you need them:
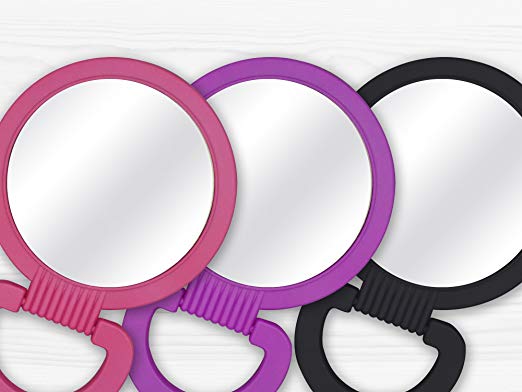
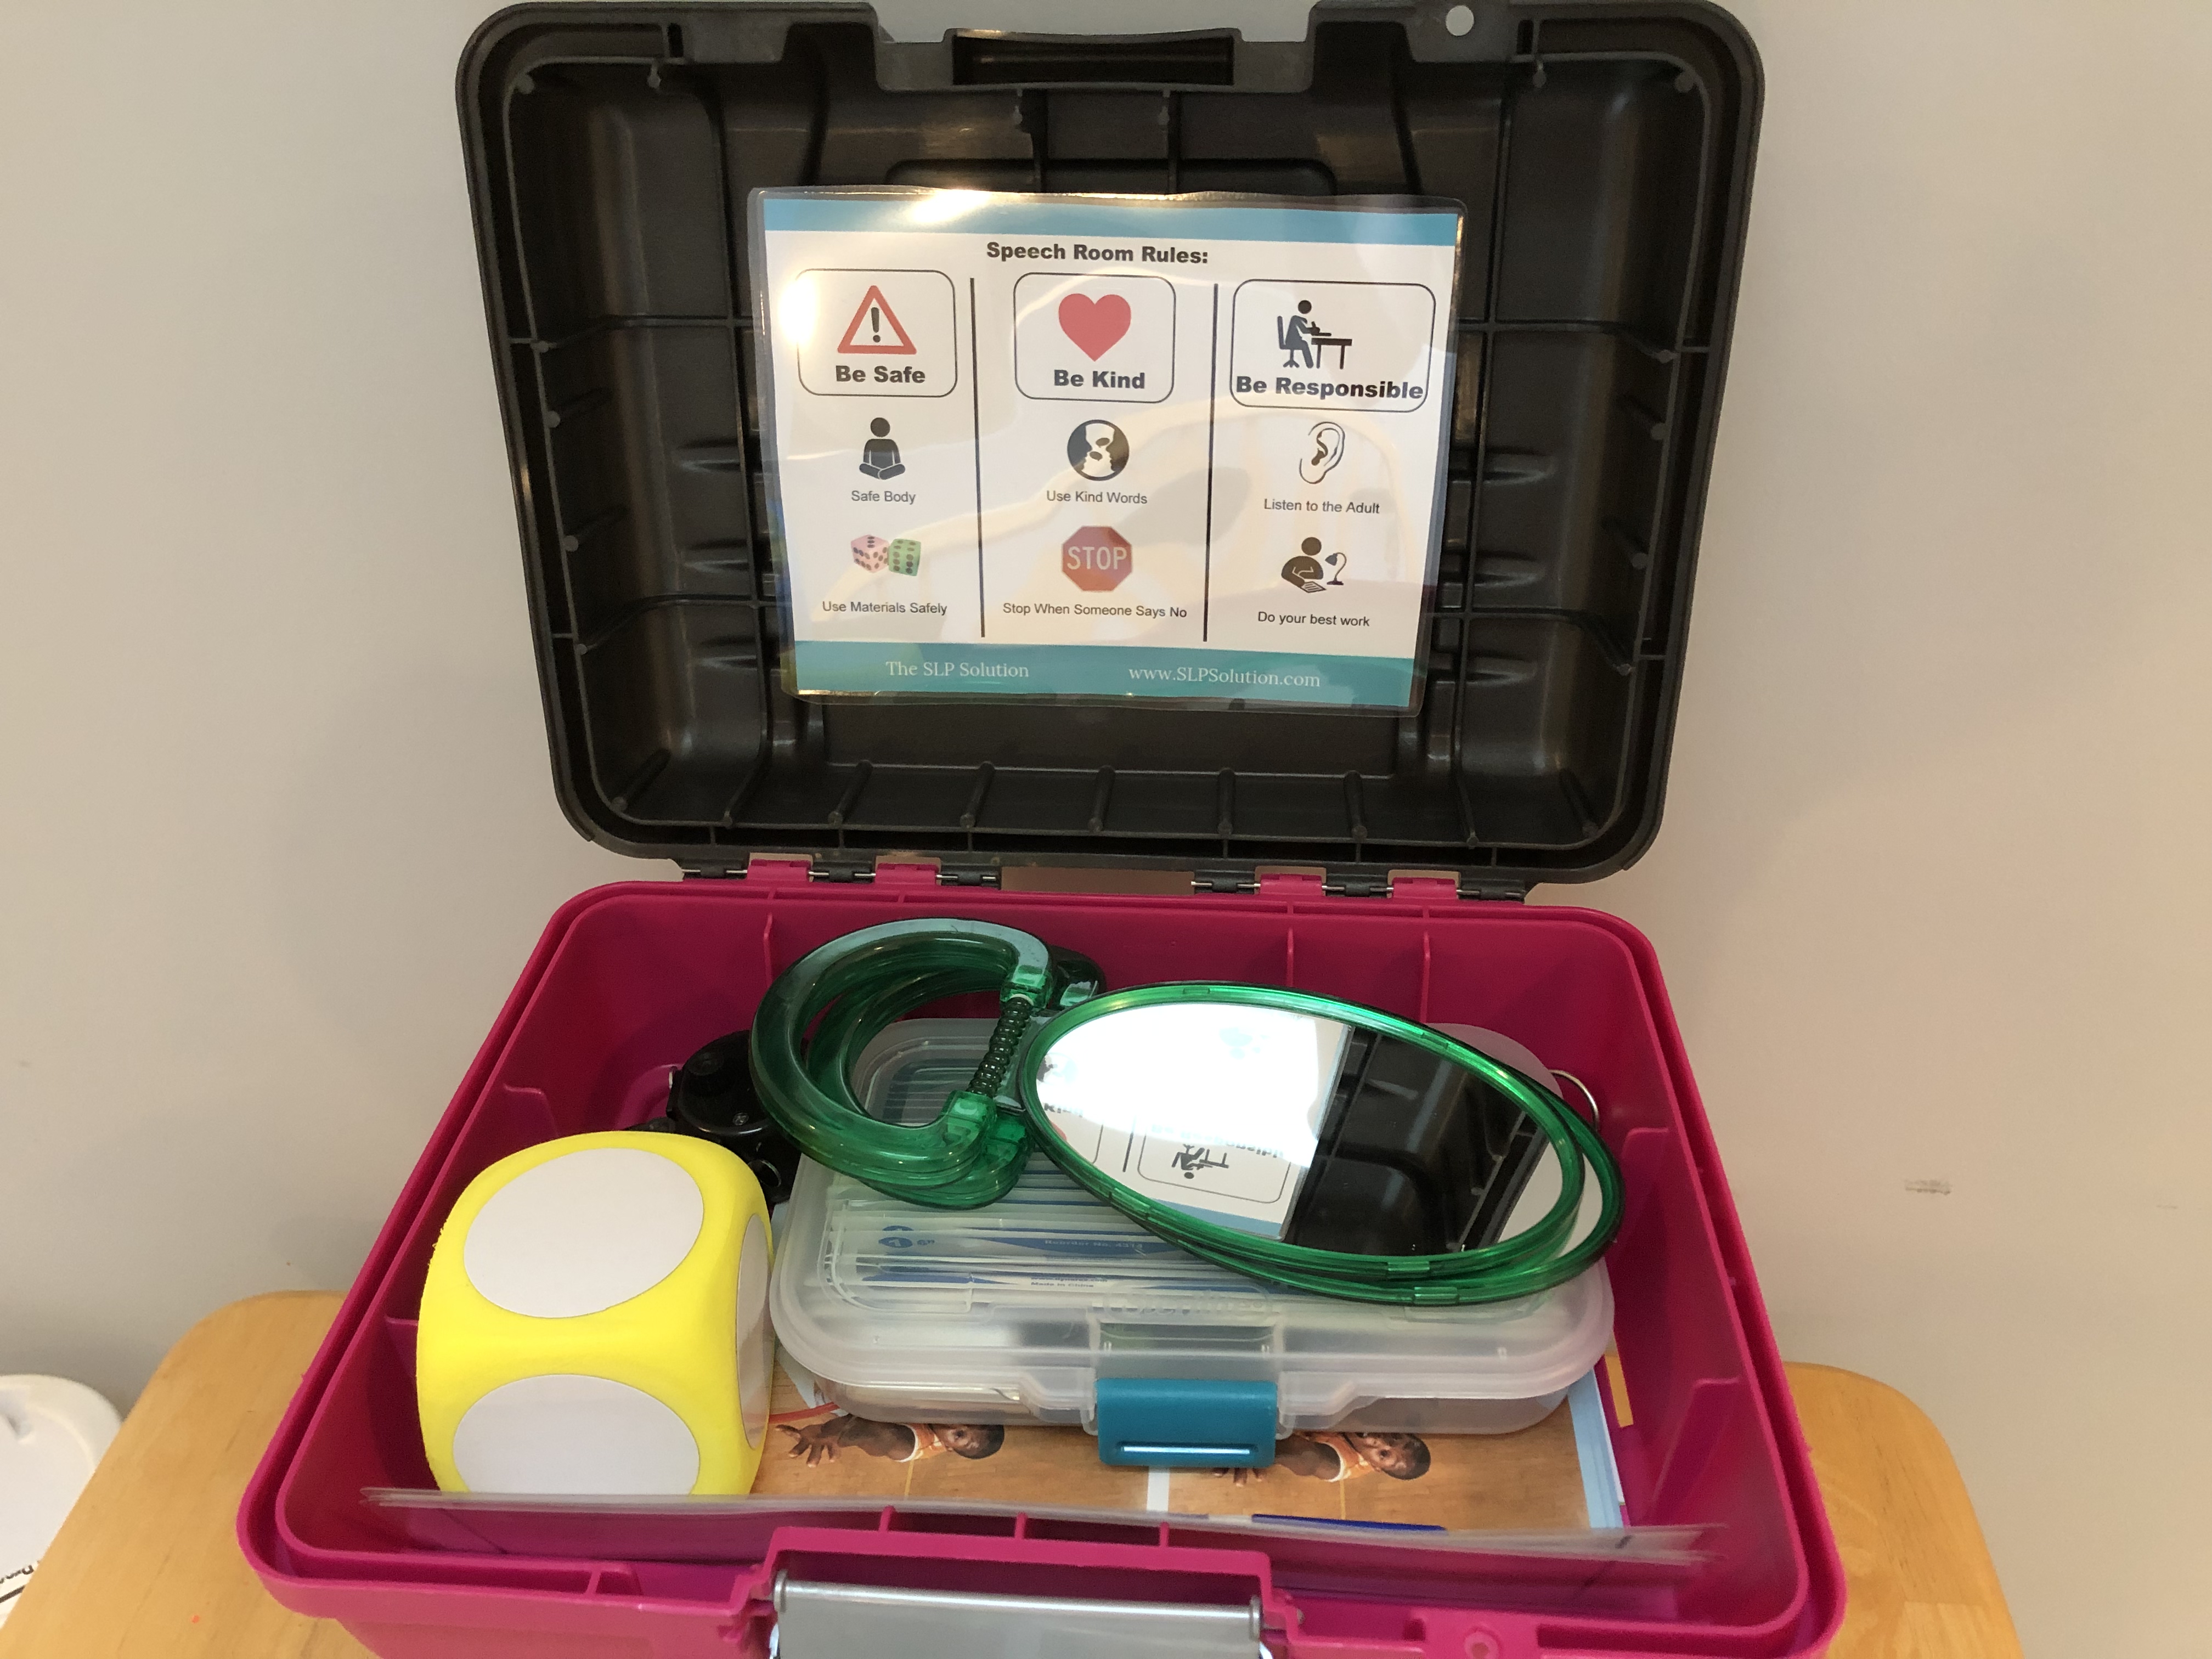
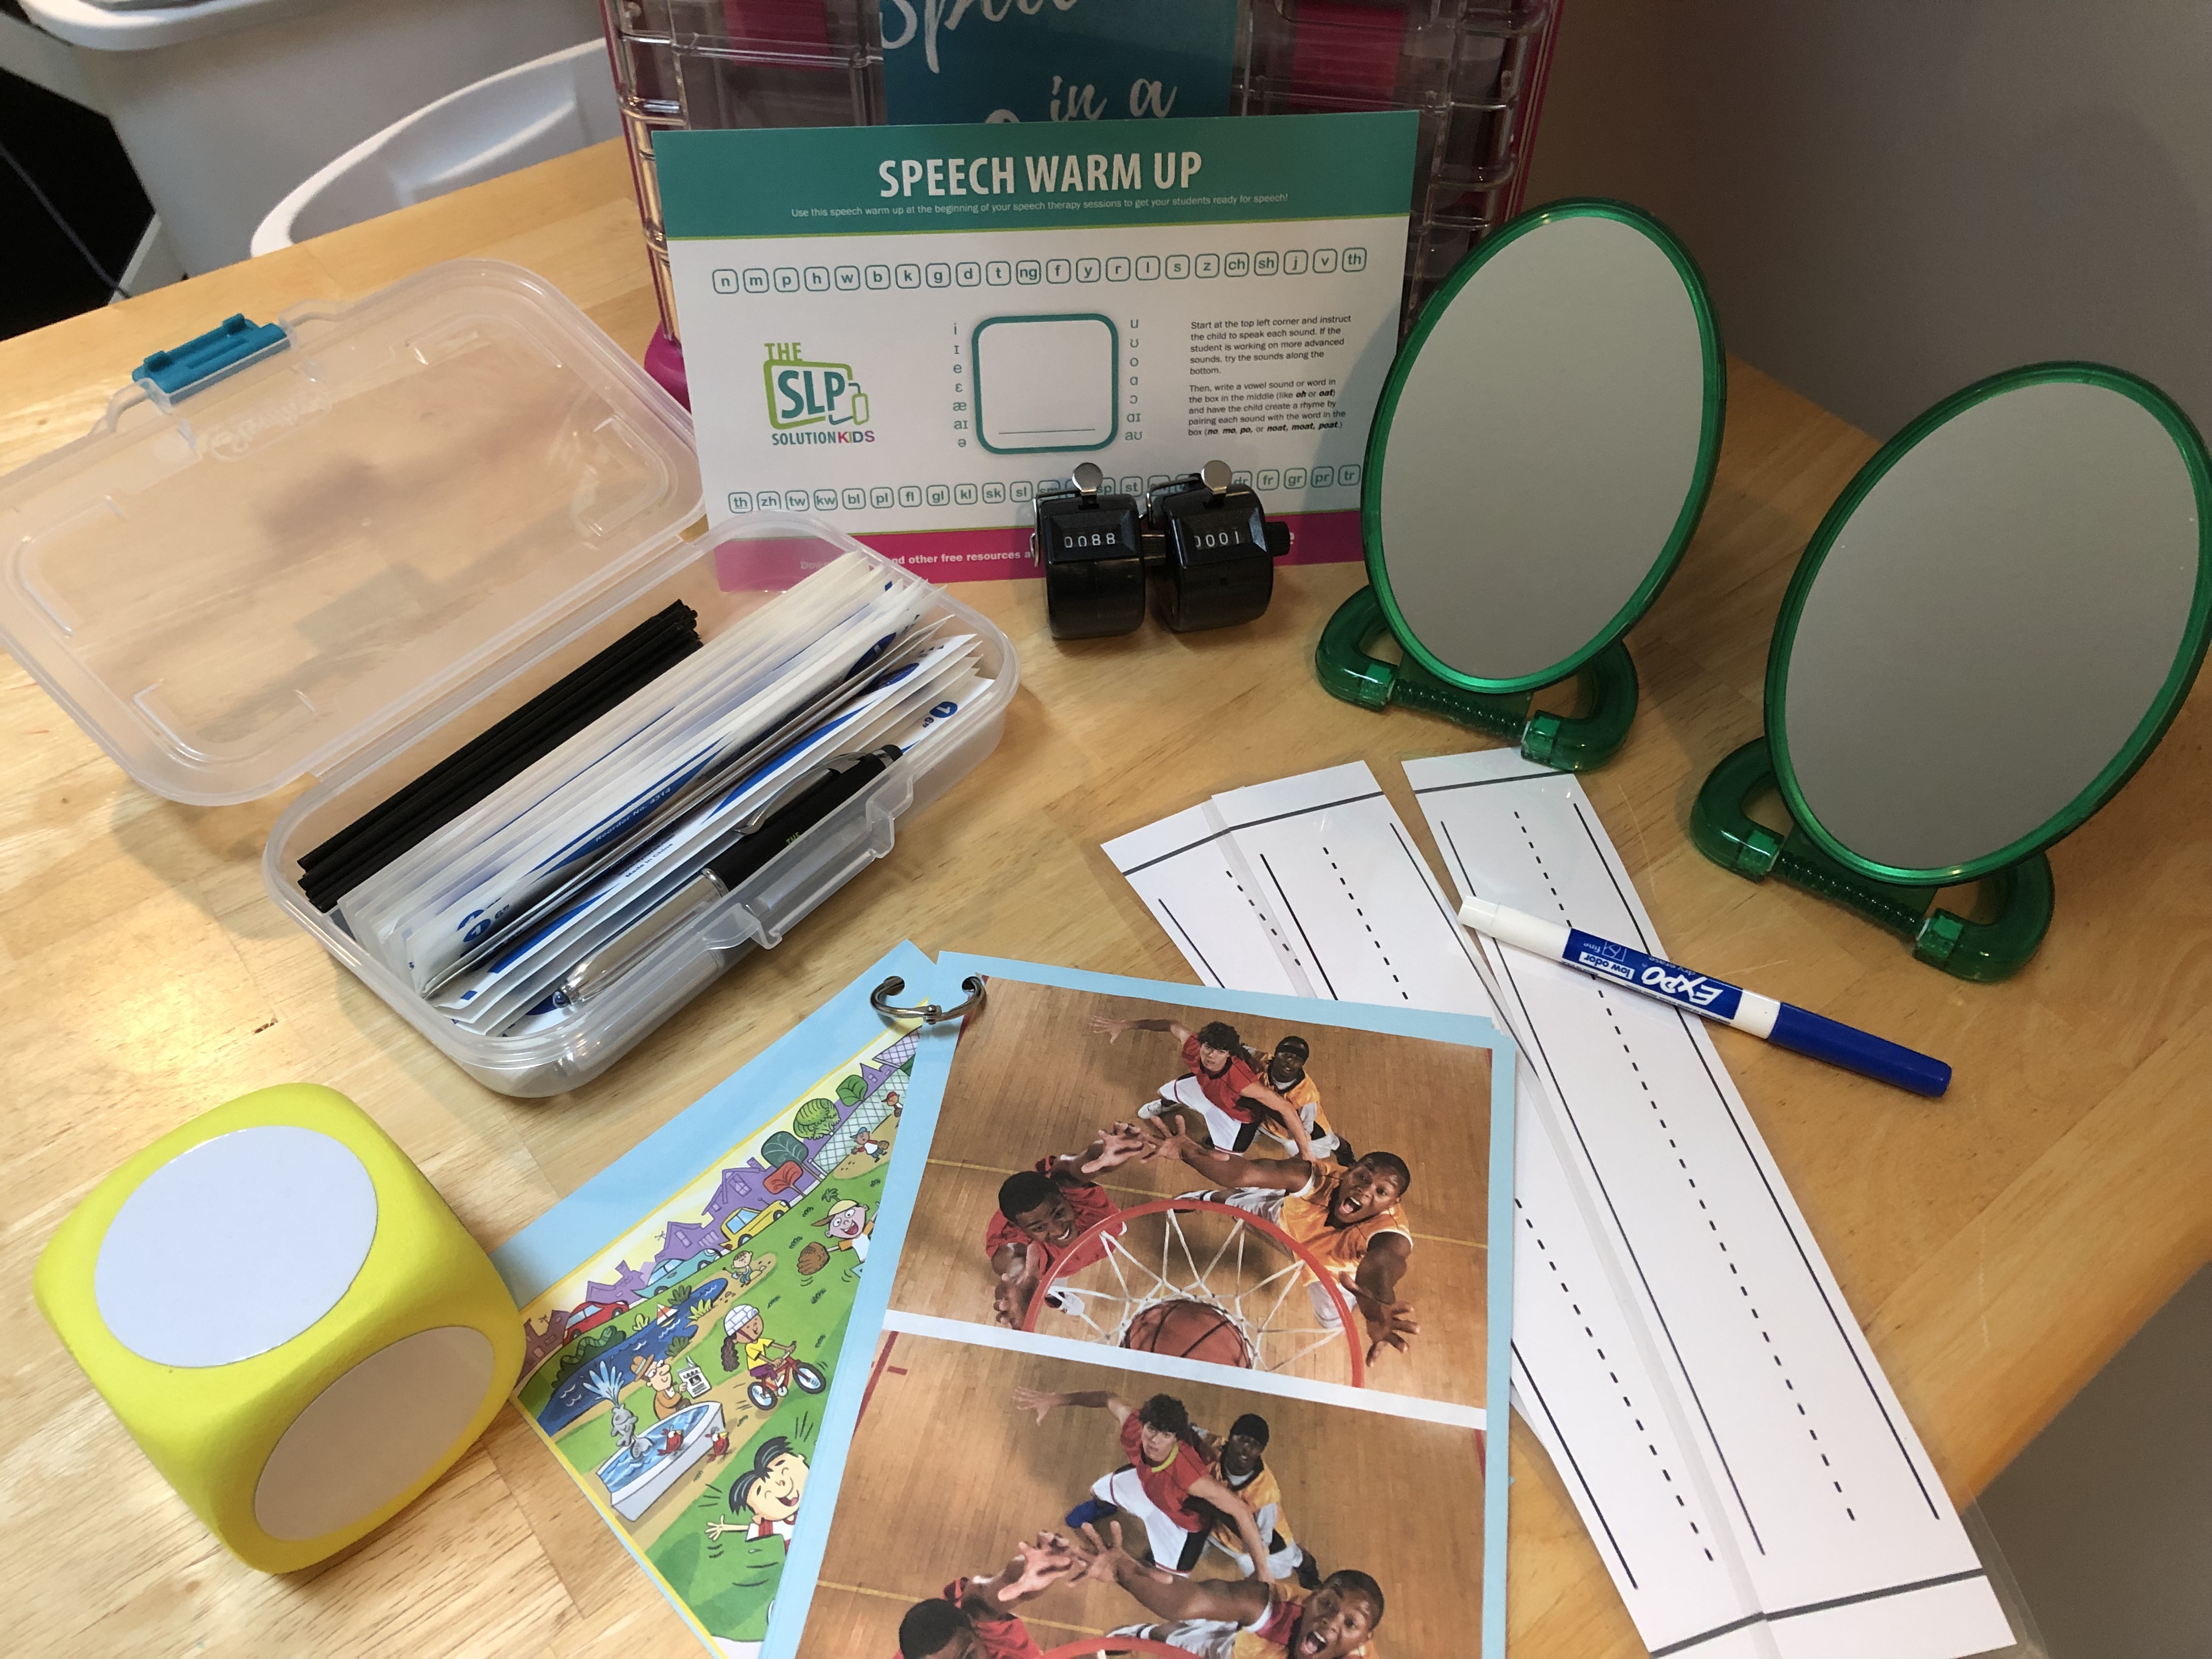
Step Four: Call in The Reinforcements

Ok, your roster should be looking pretty good by now.  You’ve replaced those large unitaskers with small multitaskers and you’ve kicked anyone off the team that wasn’t pulling their weight.  Then, you added some utility players to fill in the gaps.  Now, we’re going to call in the reinforcements.  This is the last piece missing.  The reinforcements are what keeps everyone on track during the session and reinforces what the child is learning. 


Your reinforcements can be items that facilitate proper production of sounds or skills.  They can be visual aids that help children understand and follow expected behaviors and stay on track.  Or, they can be motivational items like stickers, stamps, or smelly chapstick (for the back of their hand as a secret stamp) that help them get through the hard work because they know something fun is waiting at the end.  Check out our links to our favorite reinforcements below:


Our Favorite Reinforcements:

Facilitation Items:

Mirror

This is a must have for children who lack awareness and need to see what they're doing. It can also be great for working on emotions and body language.
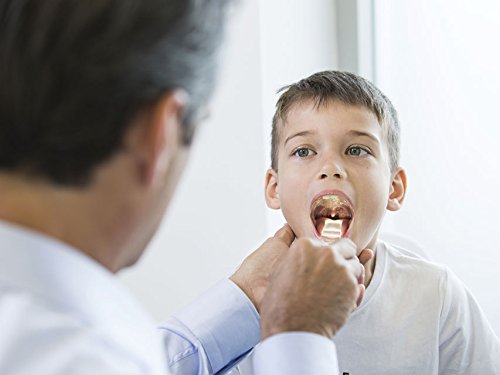
Tongue Depressors

We REALLY love these light-up tongue depressors by Throat Scope but regular tongue depressors work too!
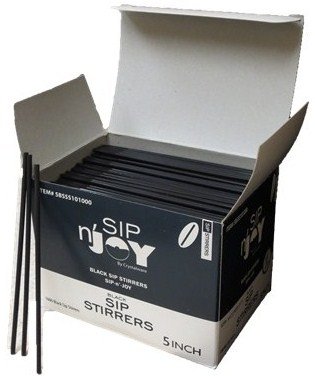
Coffee Stirrers

If you find that those tongue depressors are a bit too big to get great placement, try coffee stirrers instead!
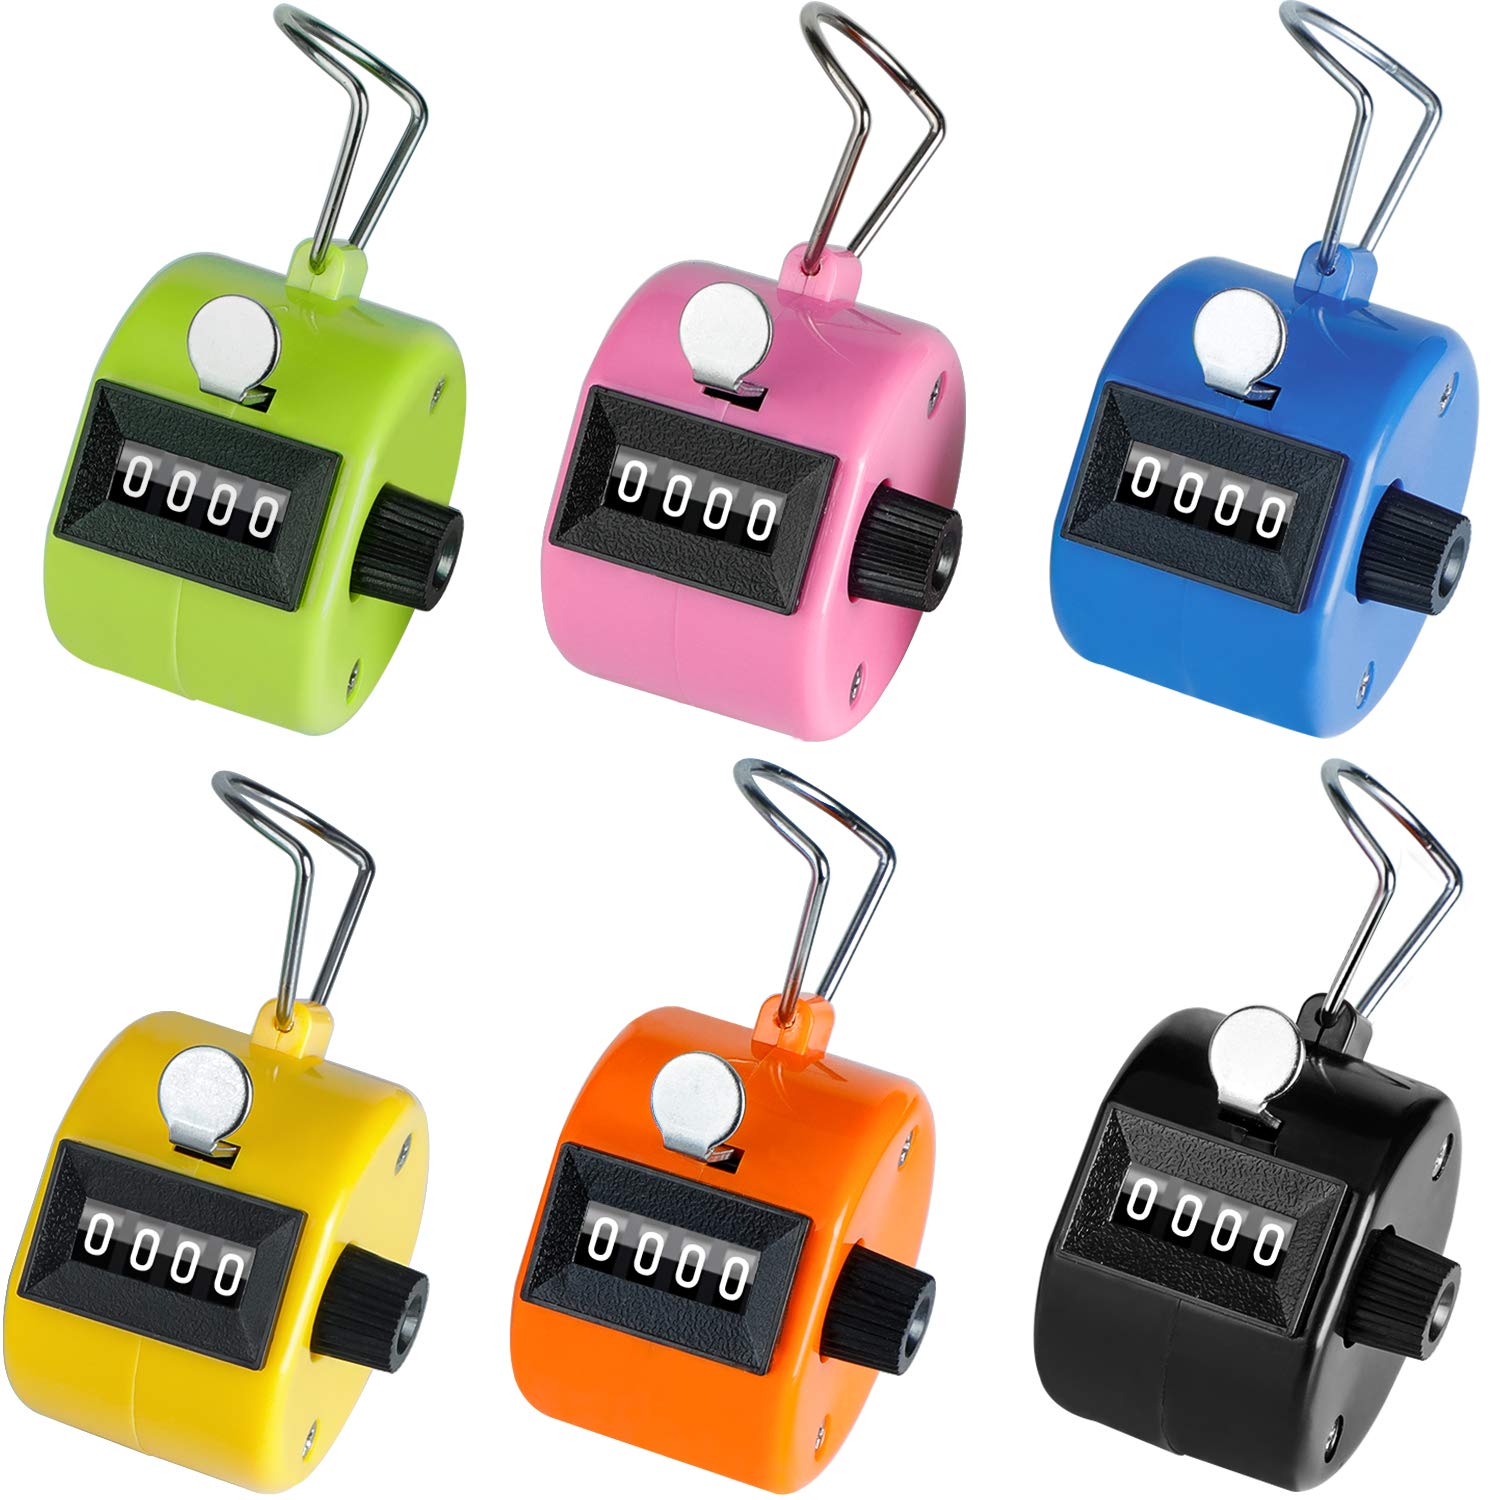
Clicker Counters

These are great for data collection AND for helping children catch their mistakes. If you are collecting data, grab two clickers, one for correct and one for incorrect. Click away while your client is practicing. To work on awareness, tell the child that you'll click every time you hear an incorrect production. The audible click will serve as a reminder!
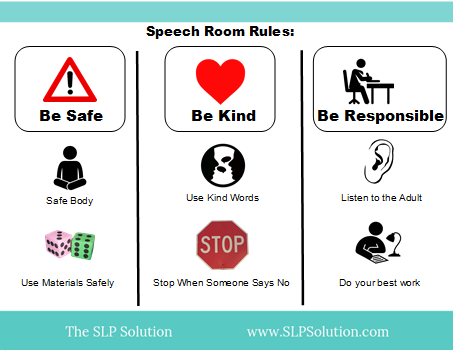
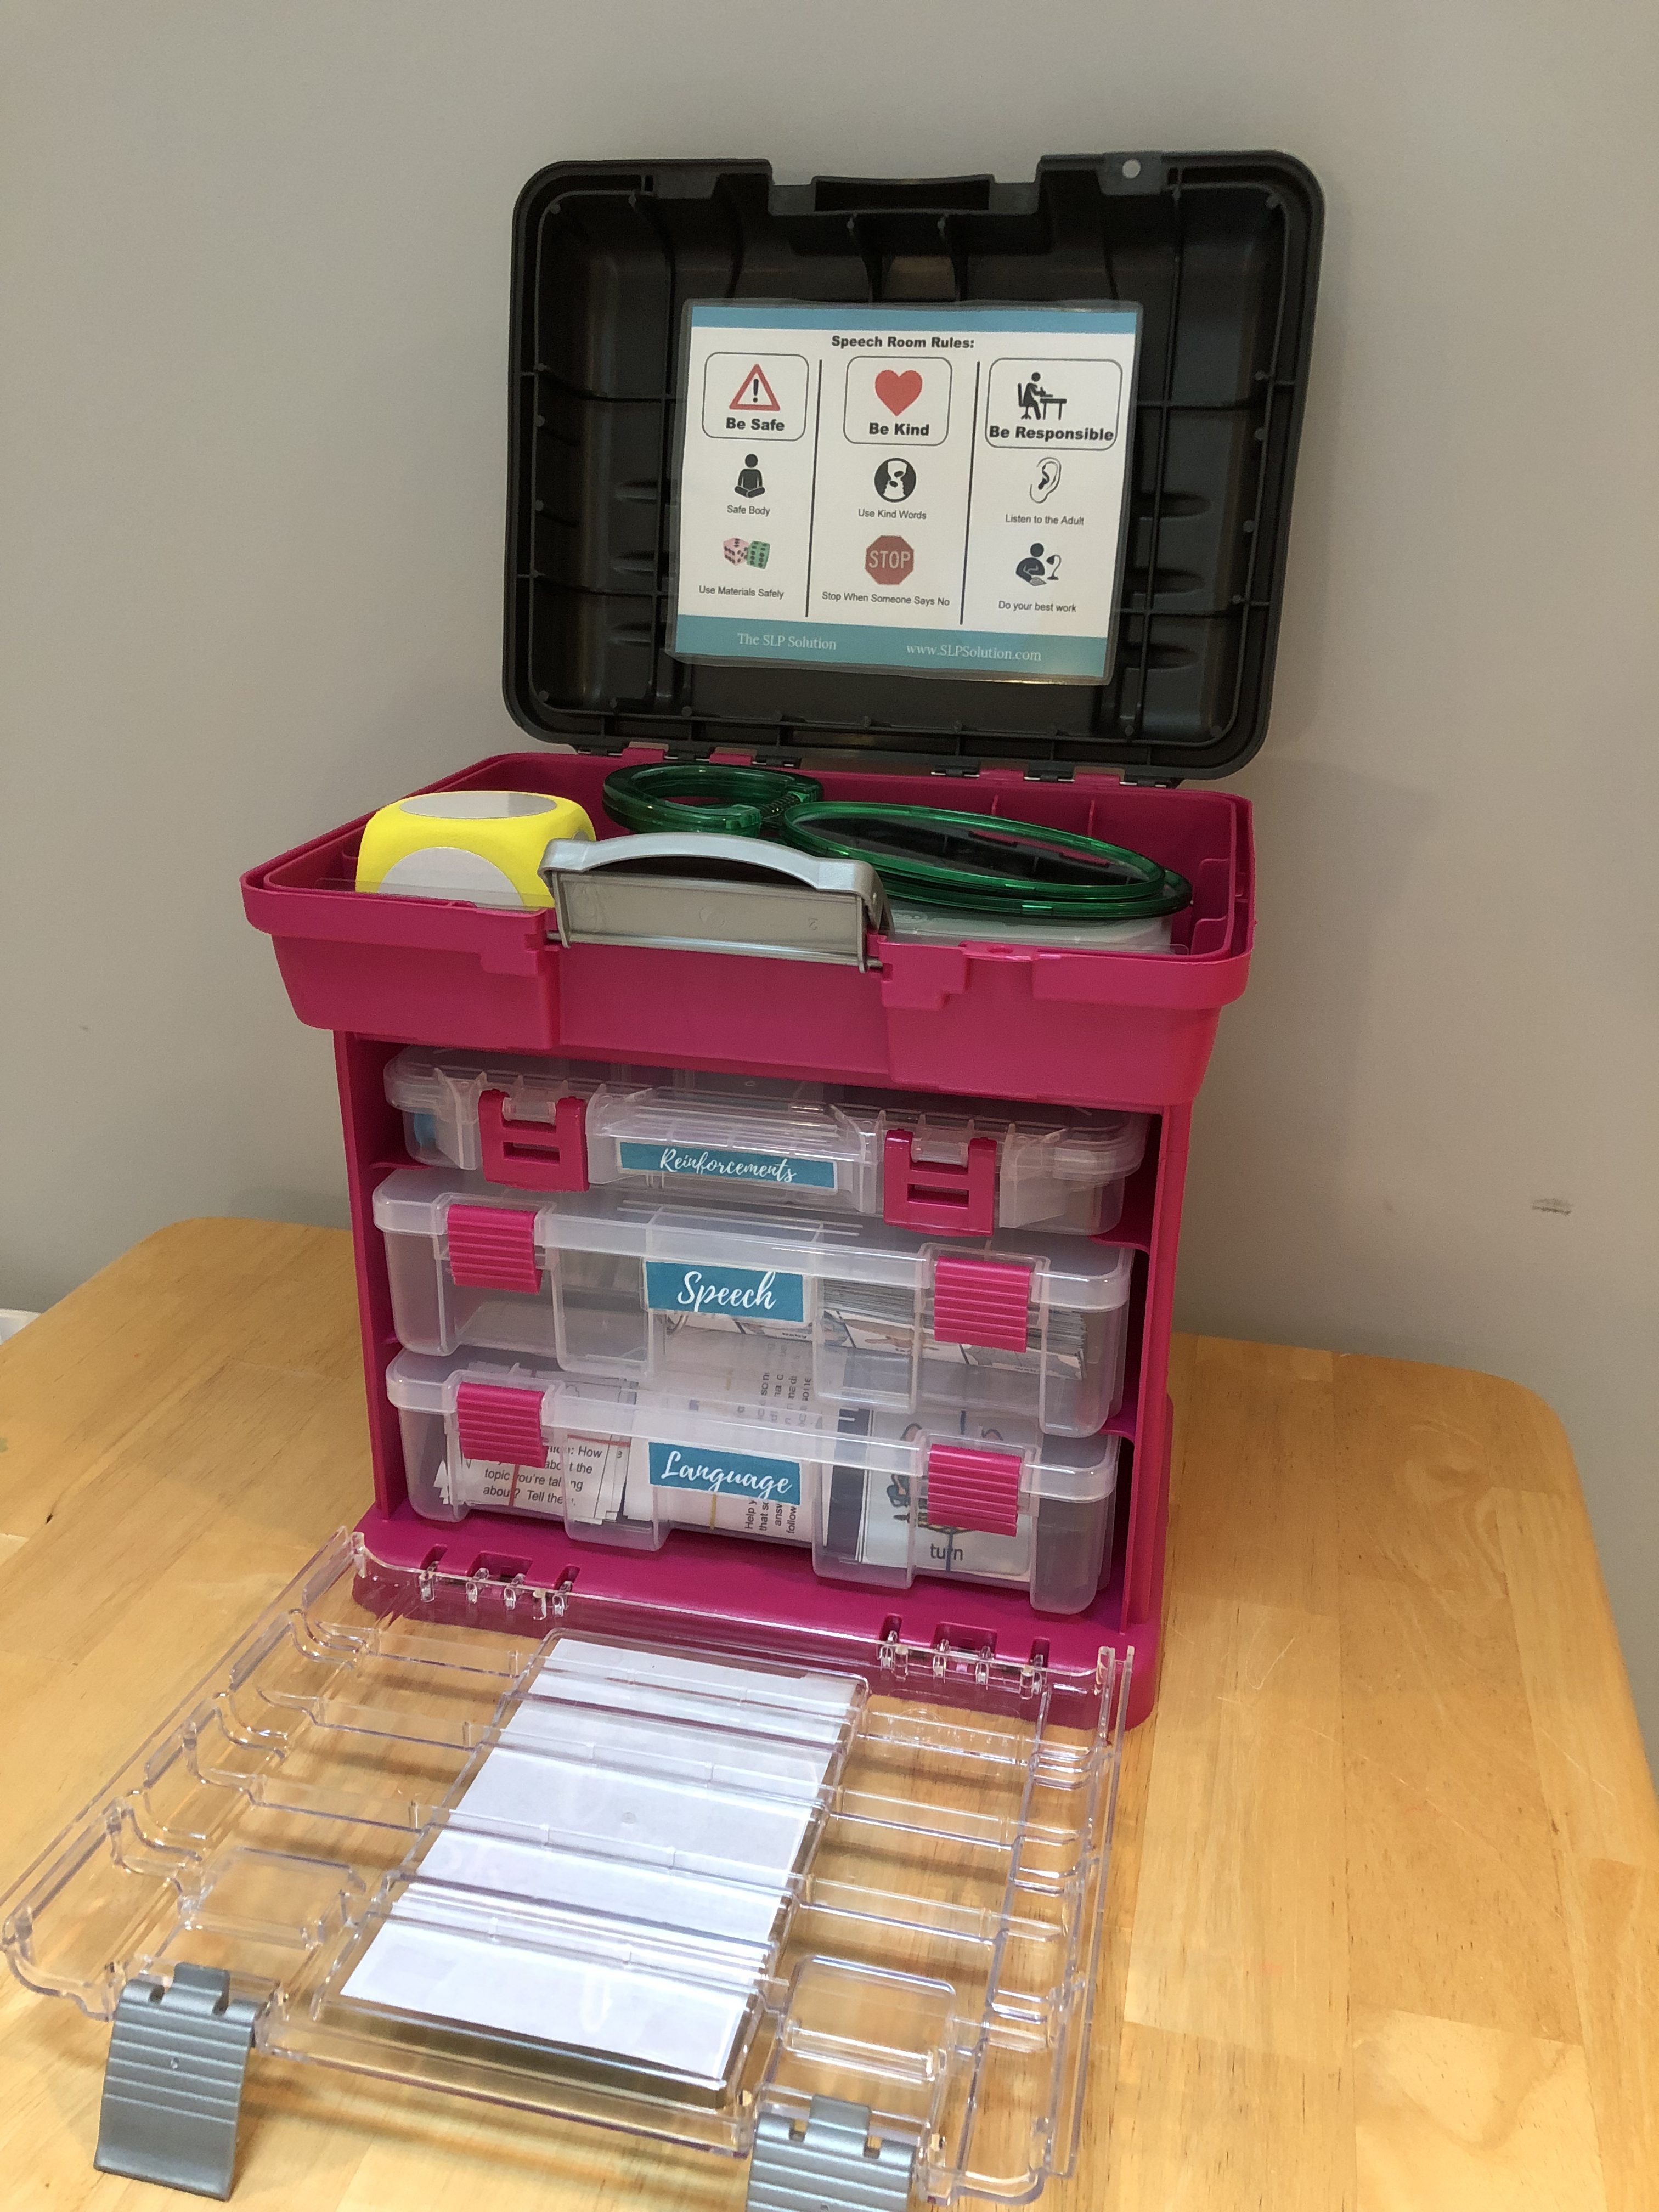
Visual Aids for Better Behavior:

Speech Rules

Have a quick set of rules that you follow in your speech sessions. Review these at the beginning of each session and refer back as needed. You can grab ours in the "Speech-in-a-Box Labels and Visuals" bundle, or create your own!

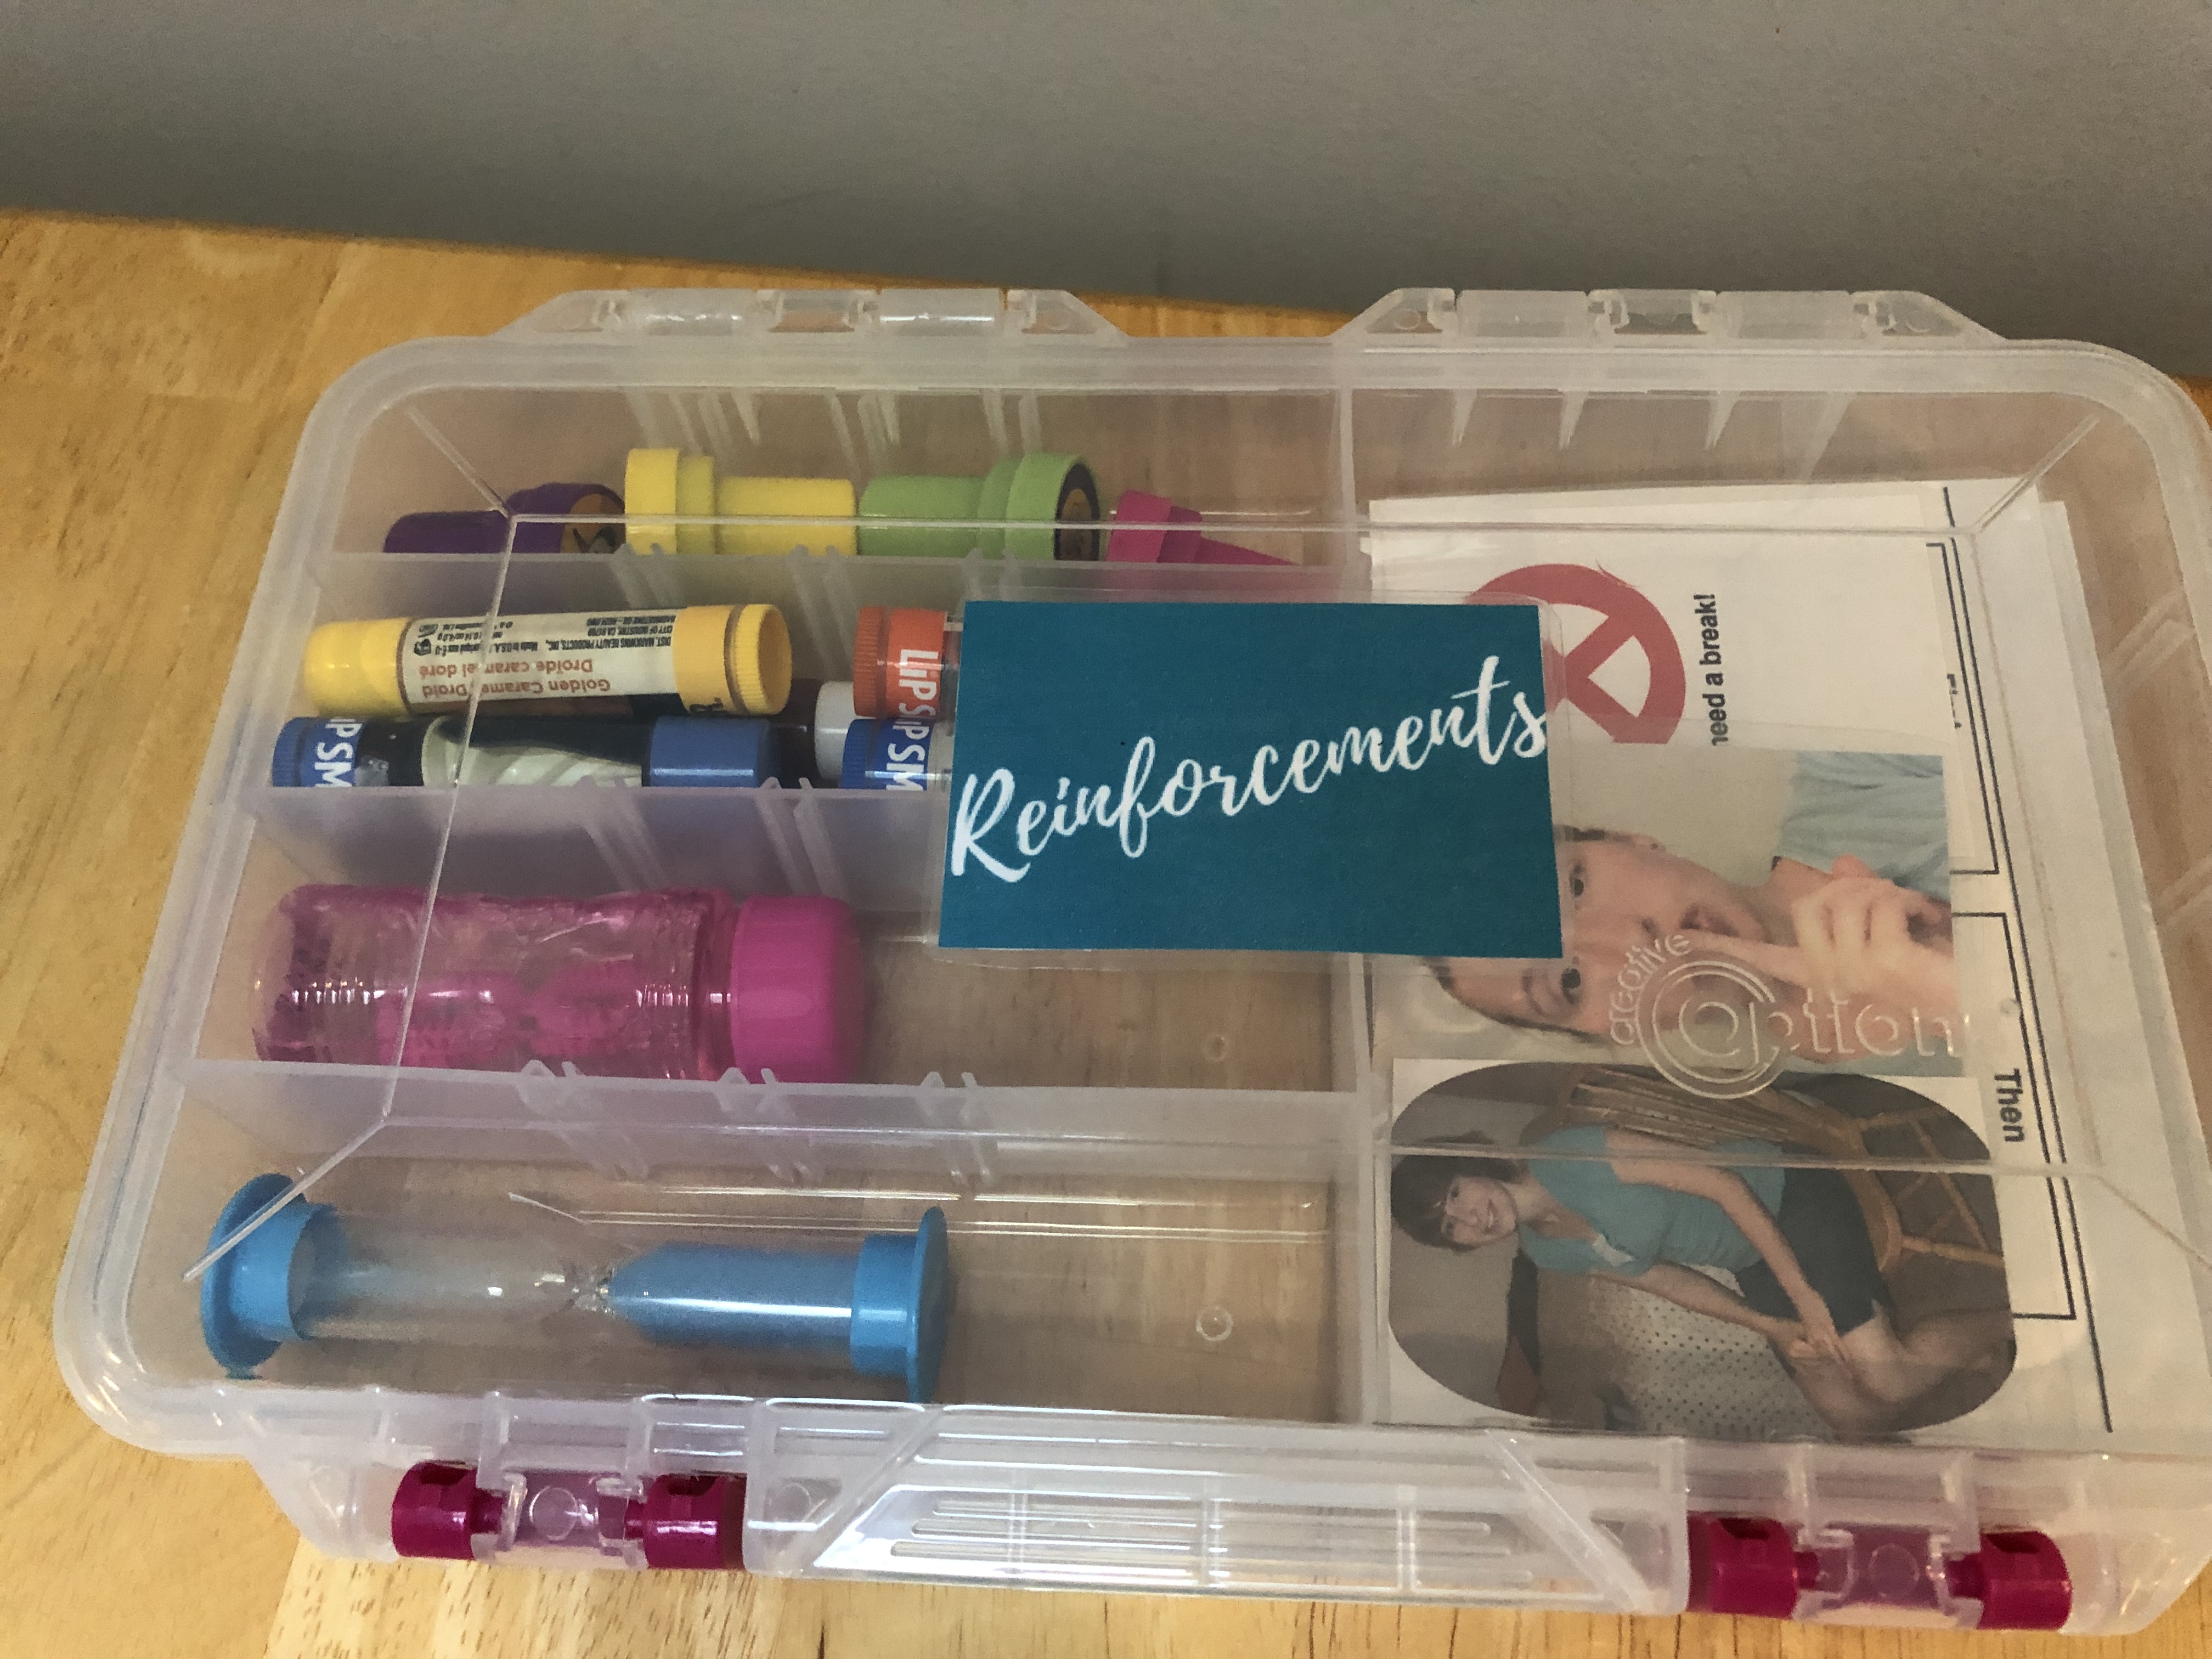
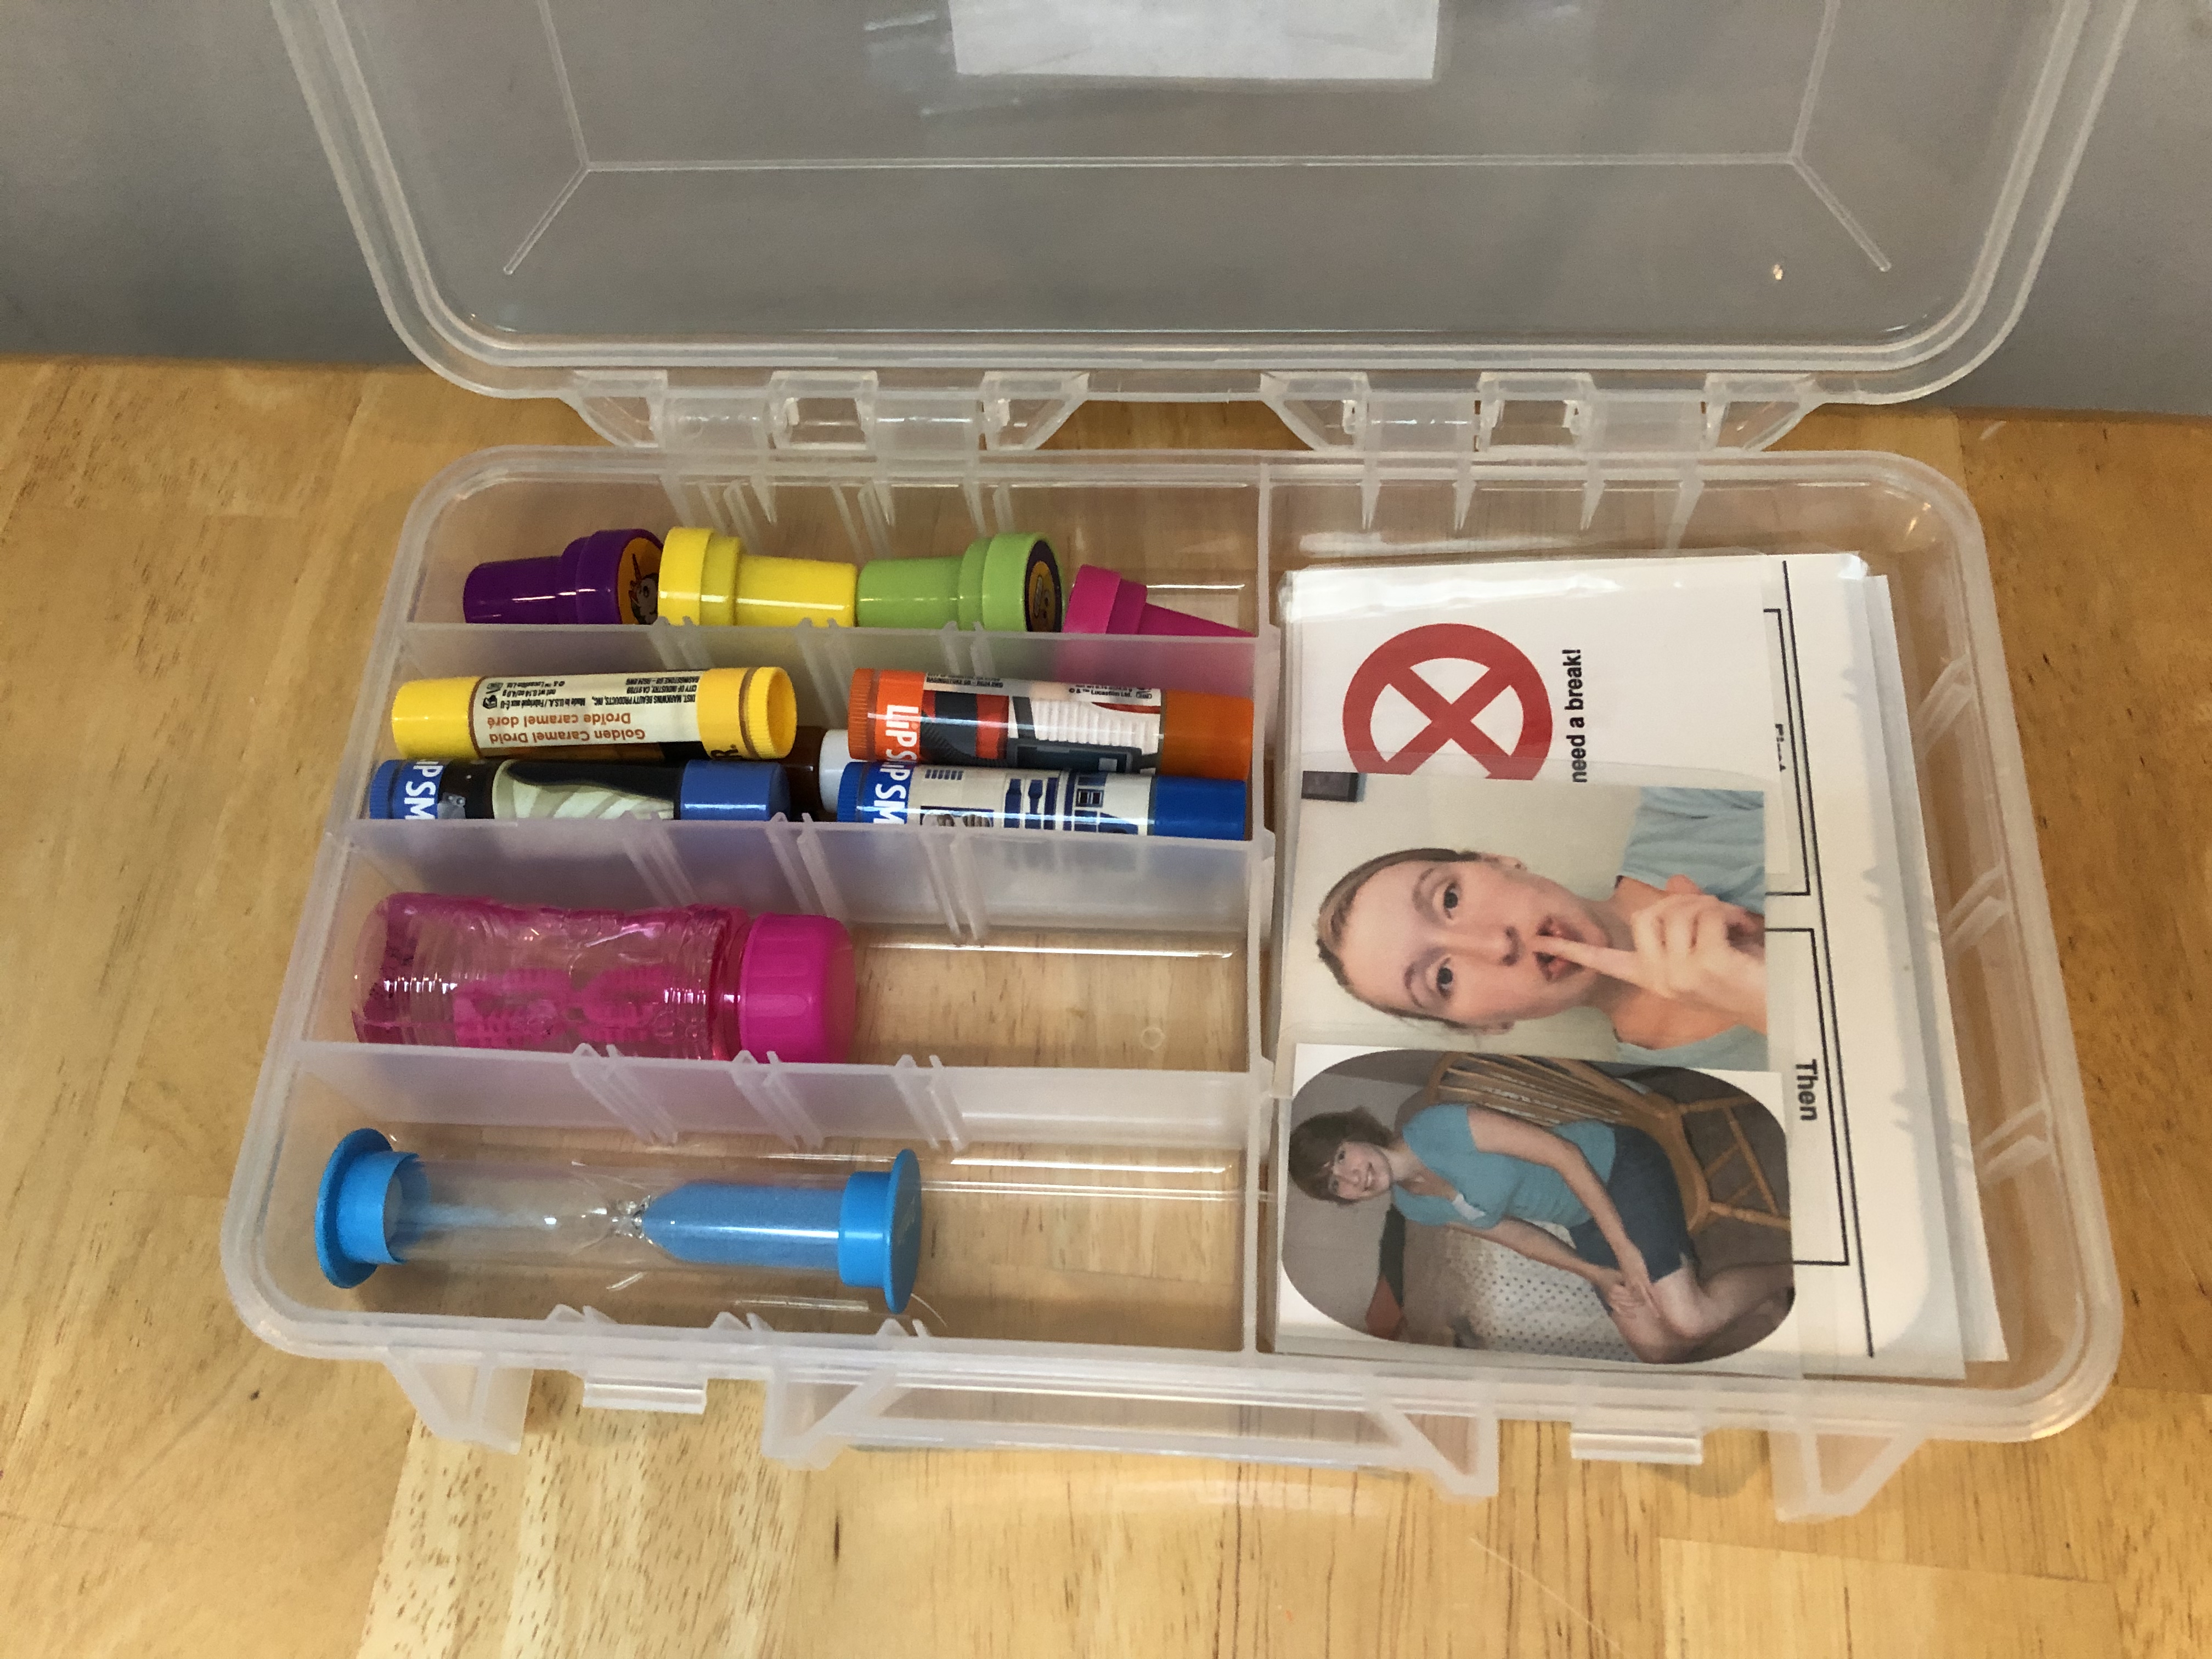
Behavioral Support Visuals

Make sure to have plenty of visual aids that will help your clients regulate their behavior. Our favorites are a mood thermometer, a first/then board, a "shh" cue, a "sit down" cue, and a break card. You can get ours in the "Speech-in-a-Box Labels and Visuals" bundle or create your own!
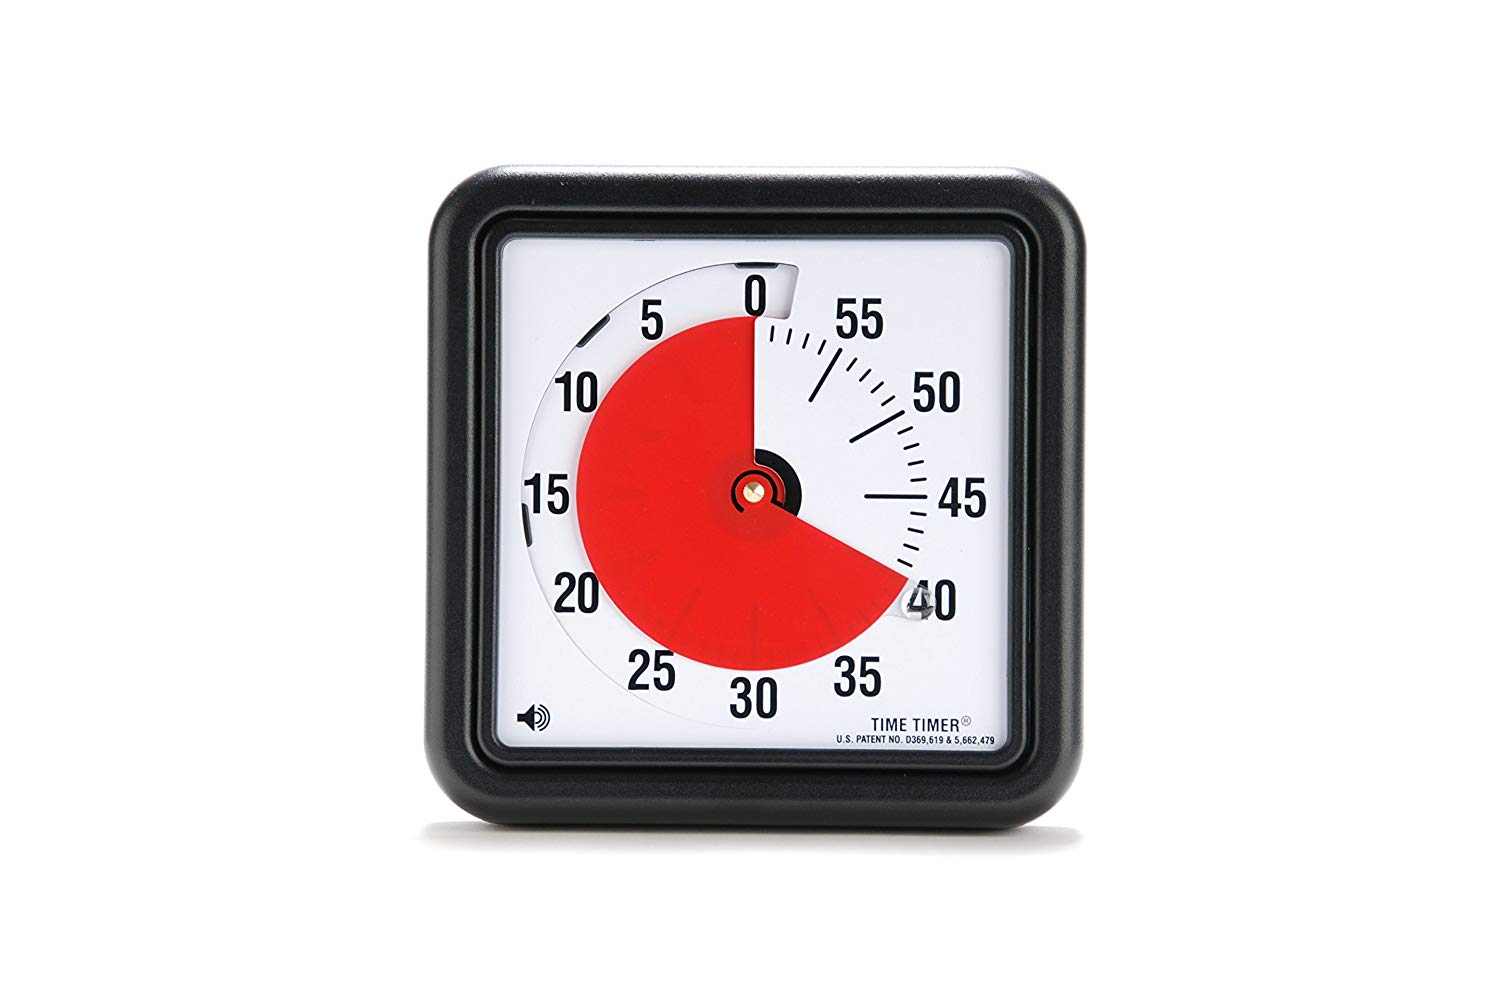
Visual Timers

Let's admit it, our clients aren't always thrilled to be with us. Sometimes, a visual timer can help them see exactly how much longer they have to work before they get to play. I love this simple one from Amazon but you can also use a sand timer as well.

Step Five: Drive the Bus

Ok, the sports ball analogy is falling apart on me now but here’s the part where you get to put it all together in a convenient storage container!  Woo hoo!  I personally have one that I love the best but there are all kinds of great storage options out there.  For this step, place all of the things on your updated roster onto the table in front of you.  It’s super helpful to see how much stuff you really have before you pick out the storage container.  

At this point, take one more opportunity to make any last minute cuts and remove anything that doesn’t seem all that essential.  Sometimes we get so excited by this process that we go a little overboard and have too many items.  So if you see anything now that should really go into the “other therapy materials” organization project, pull it out now.  This kit should JUST be the essentials.

 And now, the moment you’ve all been waiting for…here’s how I put it all together!

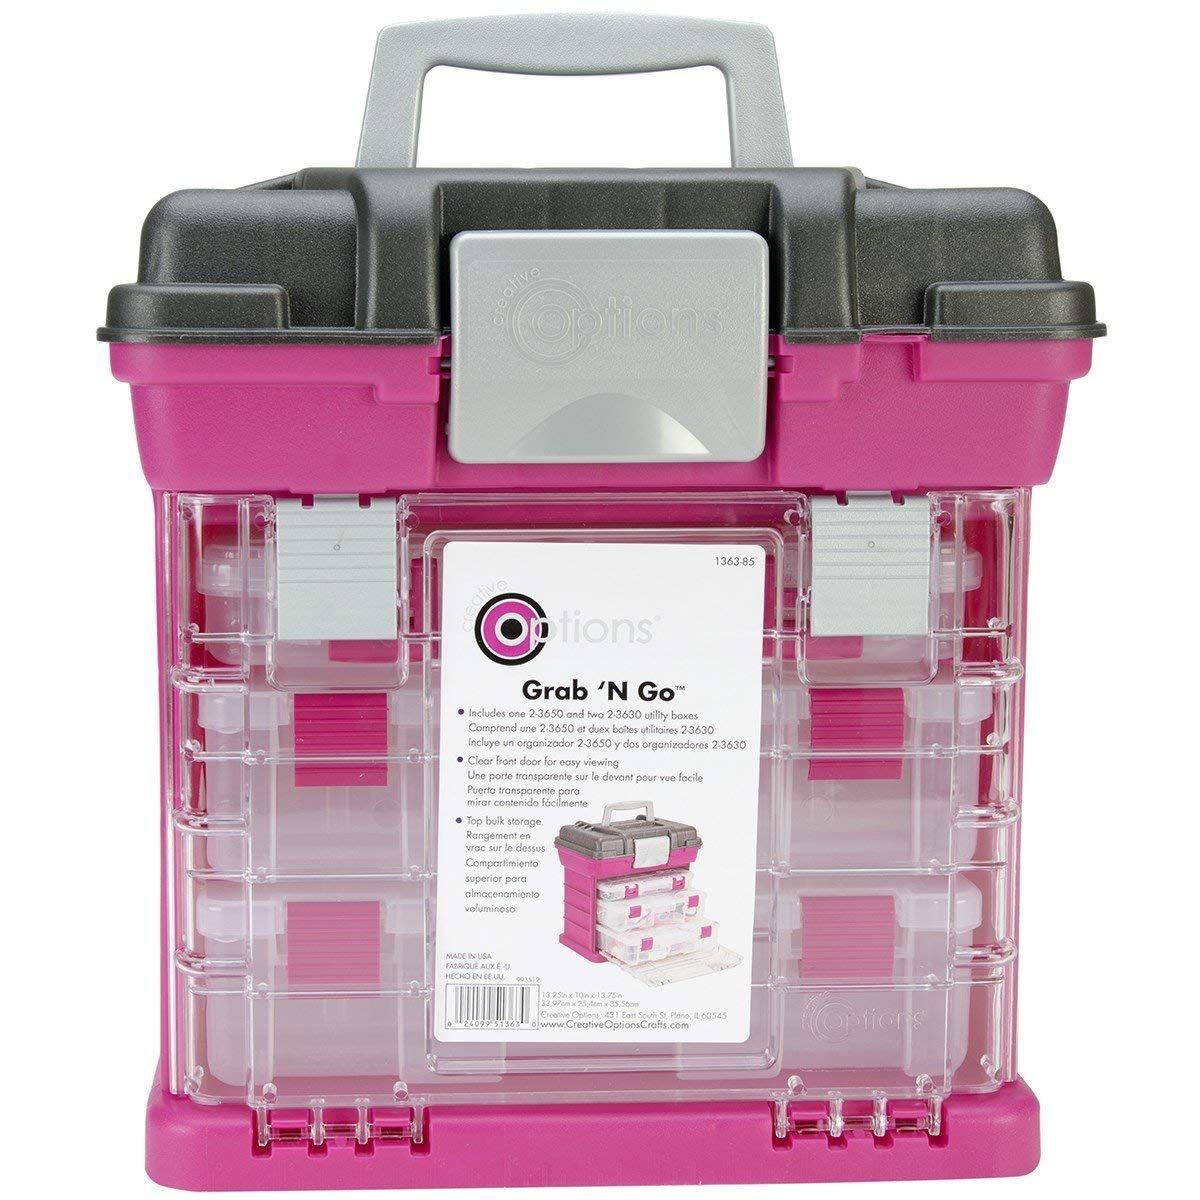
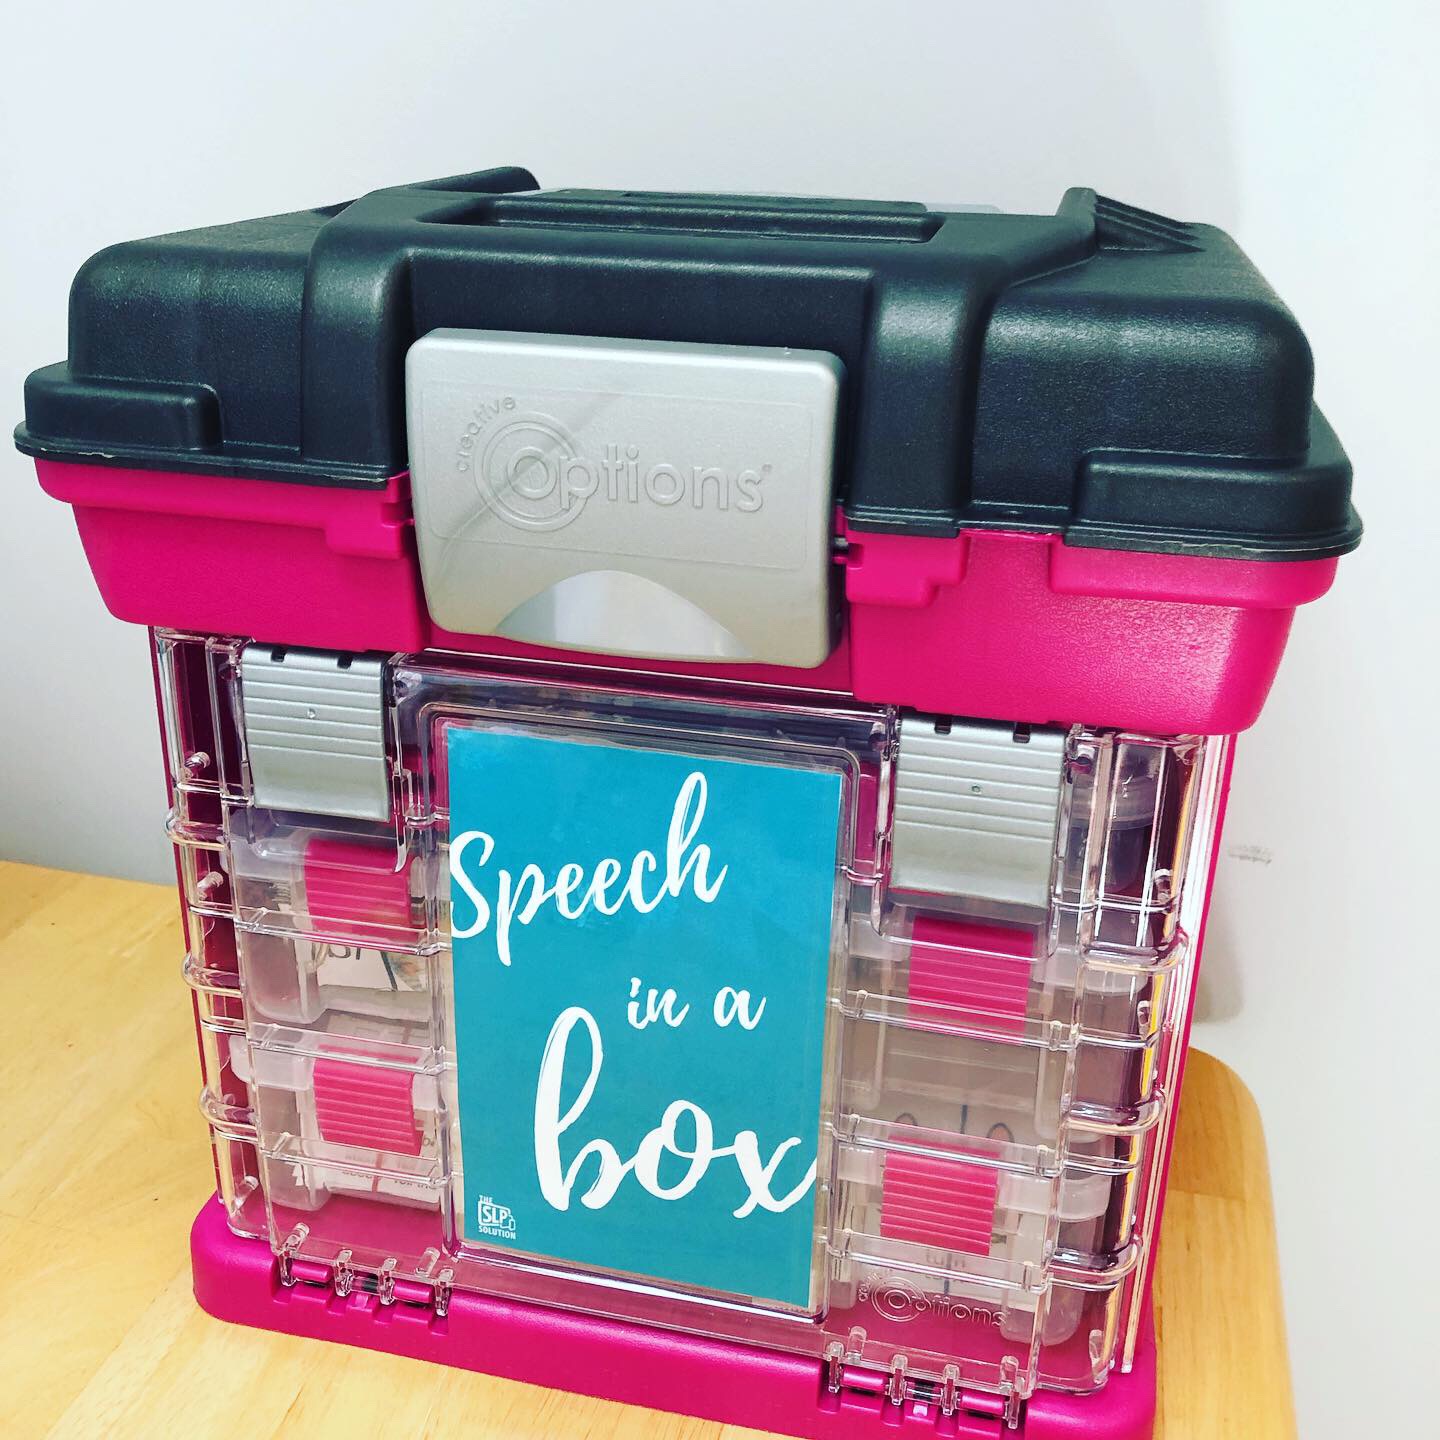
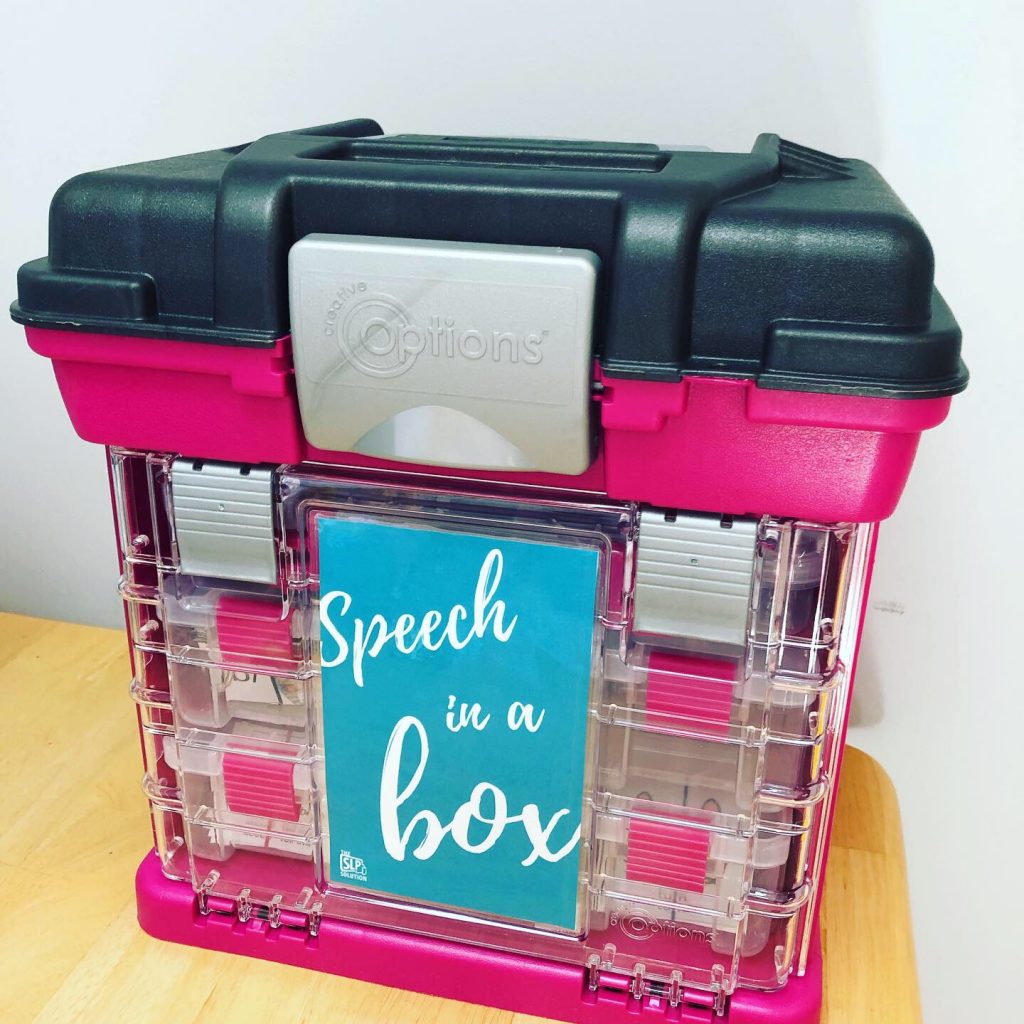
Creative Options Grab 'n Go

This is literally my favorite organization device of all time! It has three smaller cases inside the larger one and a storage compartment on top. This is the case that I've created my labels for (see the links below) and it's the one that holds all of my artic cards and language cards. I like the inside cases because they are tall enough to accommodate the 2x2 cards. Many others are too short.

The End Result:

Here’s how it all turned out!  I went ahead and bundled up all of the materials that I used to create this because I knew people would be asking. 

Click here to view all of the cards, labels, and visuals for my kit!

Recap: 

Ok, there you have it!  Everything you need to create your very own “Speech-in-a-Box” kit!  Here’s a quick recap of what we’ve done today so you have the steps in front of you.  Make sure you do this because next week we’ll be talking about the next step.  Remember, we’re going to organize everything you have and do this summer.  So hang on, you’re in for a ride!

Today’s Steps:

  1. Write down everything you use frequently.
  2. Look for ways to replace your materials with items that will serve multiple purposes and fit in smaller places.
  3. Add some materials that will let you work on just about anything.
  4. Throw in some stuff to help with behavior and make your sessions work better.
  5. Put it all in a nice, neat organization system.

Share it With Us!  

Once you get this done, we’d love to see it!  Share it on your favorite social media channel and tag us so we can see to!  Everyone’s kit will be a little different so it’s SO helpful to be able to see how others are doing it as well!


Next Week: 

In the next post of our Summer Organization Series, we talk about how to organize the rest of those therapy activities and worksheets.  Click here to view that post now!

Click the button below to get an email notification when that new content is out: 


Helping You Help Them

Our Mission

We all got into this field because we wanted to help.  But high caseloads, tons of paperwork, and not enough planning time leads to burn-out and stress.

The SLP Solution’s mission is to support you with tools, resources, and expert advice so that you can be there for the children who depend on you!

*** The SLP Solution is for informational and educational purposes only and does not provide medical or psychological advice.  We provide general resources but cannot tell you exactly what should be done for a specific client.  Every client is different and your clinical judgement should be used when making decisions about specific individuals.

By using this site, you agree to the website terms of use and disclaimers.

Privacy Policy 

Scroll to Top